 Pin It
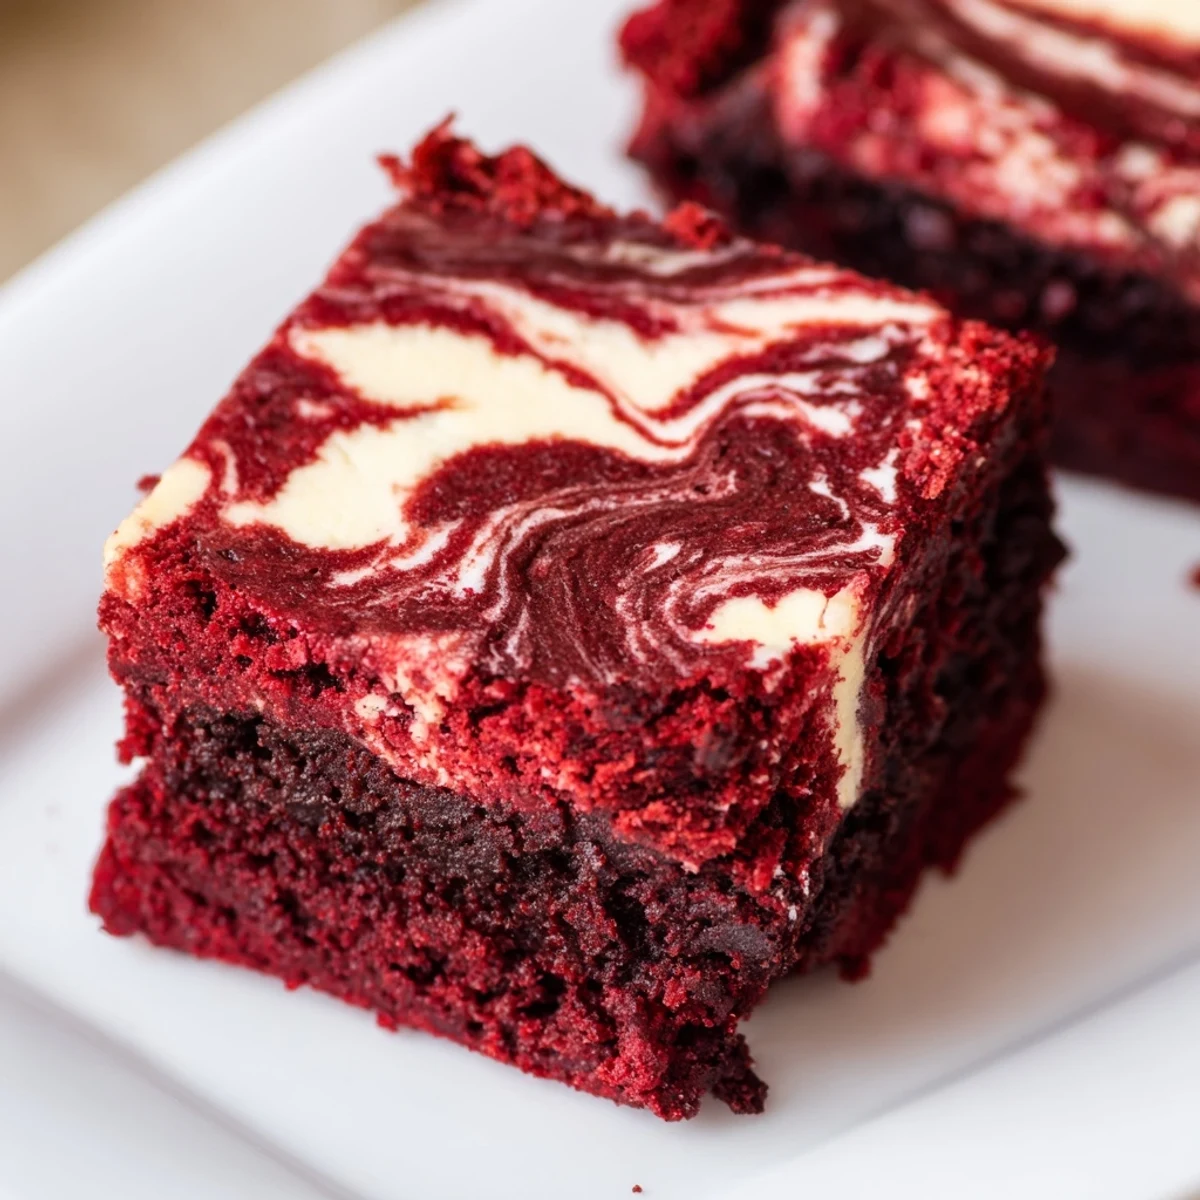
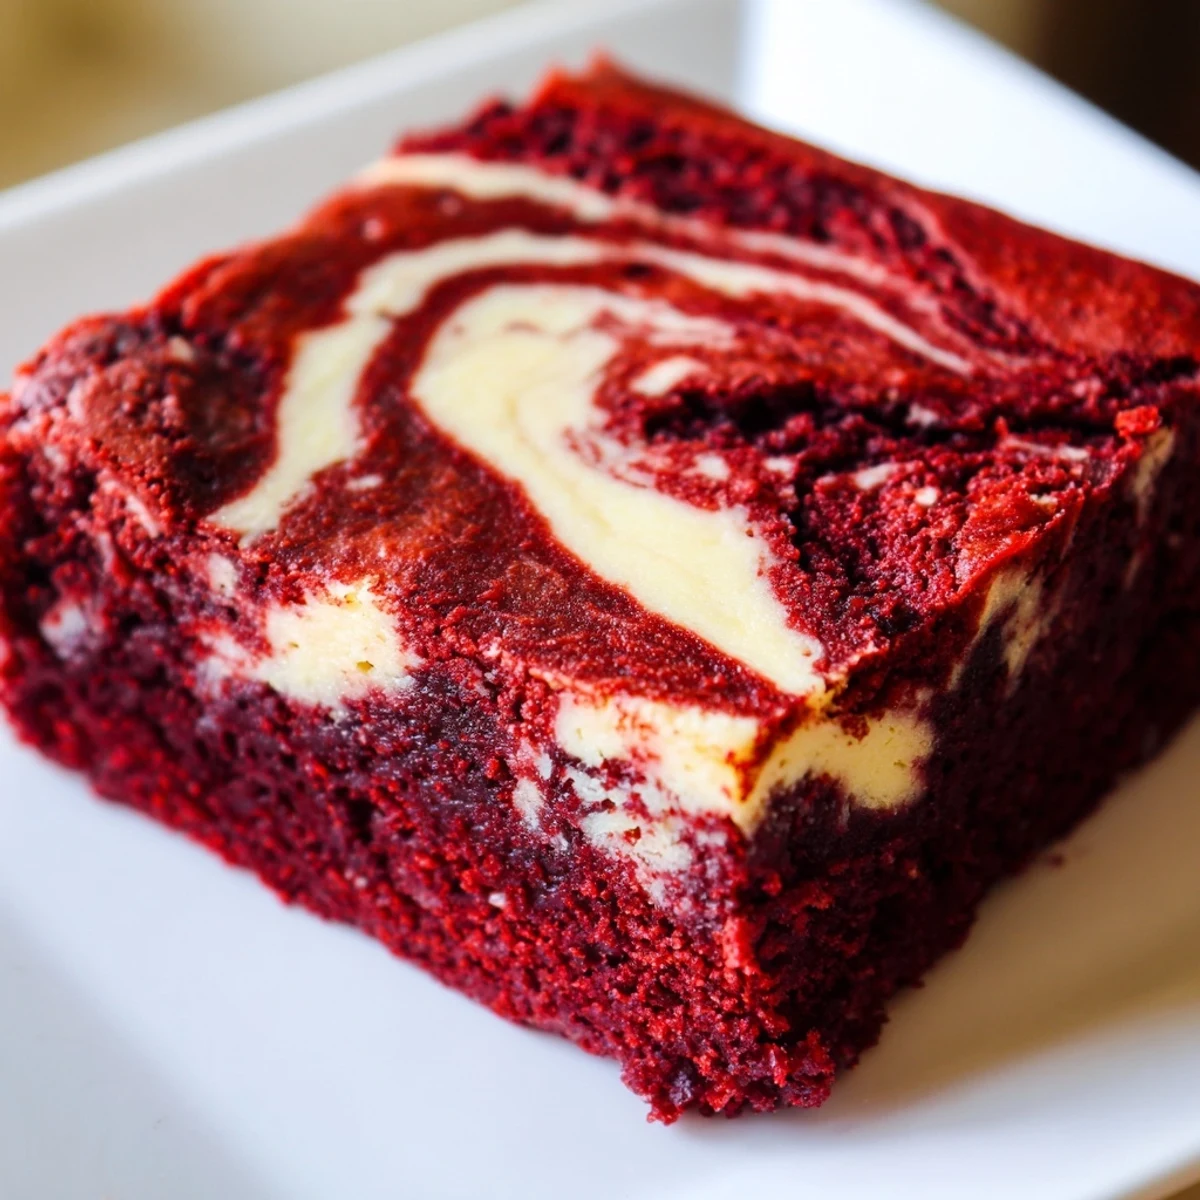
 These red velvet squares offer a delightful blend of rich cocoa and a tangy cream cheese swirl. Begin by melting butter and combining with sugar, eggs, vanilla, and red food coloring. Sift in flour, cocoa, and salt.
A portion of this vibrant batter is reserved. For the swirl, beat softened cream cheese with sugar, an egg yolk, and vanilla until smooth. Layer the main batter, dollop the cream cheese mix, then add the reserved batter. Create an elegant marbled pattern with a knife. Bake until set, then cool completely for fudgy perfection.
There was this particular dreary Tuesday, the kind where the rain just wouldn’t let up, and all I wanted was a little burst of joy. I’d been seeing these gorgeous red velvet brownies pop up everywhere, and a tiny voice in my head urged me to try making them. The vibrant red mixed with that creamy swirl seemed almost too beautiful to eat, a perfect antidote to the gray outside. Little did I know, they’d soon become my go-to for adding a splash of cheer to any occasion.
I recall baking a batch for a friend's impromptu board game night, and the kitchen filled with that amazing cocoa and vanilla aroma. We were so engrossed in a particularly intense round of Catan that I almost forgot they were cooling on the counter. When I finally brought them out, sliced into perfect squares, the 'oohs' and 'aahs' were instant, and they vanished faster than you can say 'victory point'.
Ingredients
- Unsalted butter, melted: Using melted butter here gives you that signature fudgy brownie texture, rather than a cakey one.
- Granulated sugar: This provides the perfect sweetness and helps create that glossy top crust we all love.
- Large eggs, at room temperature: Room temperature eggs emulsify better with the other ingredients, leading to a smoother batter and a better rise.
- Vanilla extract: Don’t skimp on good vanilla; it enhances all the other flavors without being overpowering.
- Red food coloring (liquid or gel): Gel coloring gives a more intense, true red, but liquid works well too; just ensure you use enough for that iconic hue.
- All-purpose flour: Just enough to bind without making the brownies tough, ensuring a tender crumb.
- Unsweetened cocoa powder: This is where the rich chocolate flavor comes from, so pick a good quality one for the best results.
- Salt: A tiny pinch of salt is crucial for balancing the sweetness and deepening the chocolate notes.
- Cream cheese, softened: Make sure it’s fully softened to room temperature, otherwise you’ll end up with lumps in your swirl mixture.
- Granulated sugar: Adds sweetness to the tangy cream cheese, making it perfectly balanced.
- Large egg yolk: This helps bind the cream cheese mixture and gives it a richer, custard-like texture when baked.
- Vanilla extract: A touch of vanilla brightens the cream cheese flavor beautifully.
Instructions
- Get Ready to Bake:
- Preheat your oven to a cozy 175°C (350°F) and line an 8x8 inch baking pan with parchment paper, leaving a little overhang for easy lifting later.
- Mix the Wet Brownie Goodness:
- In a large bowl, whisk the melted butter and sugar until they’re nicely combined. Then, beat in the eggs, vanilla, and that gorgeous red food coloring until everything is wonderfully smooth.
- Fold in the Dry:
- Gently sift in the flour, cocoa powder, and salt. Fold this mixture carefully with a spatula until just combined; remember, overmixing is the enemy of fudgy brownies.
- Prep the Pan:
- Spoon out about 1/4 cup of the brownie batter and set it aside for later. Pour the remaining vibrant red batter into your prepared pan, spreading it out evenly to create a beautiful base.
- Craft the Creamy Swirl:
- In a separate bowl, combine the softened cream cheese, sugar, egg yolk, and vanilla extract. Beat this until it’s perfectly smooth and lump-free – a silky cloud of deliciousness.
- Dollop and Swirl:
- Drop spoonfuls of the cream cheese mixture over the red brownie base. Then, add dollops of your reserved brownie batter right on top of the cream cheese spots. Take a knife or skewer and gently create beautiful swirls, marbling the red and white together artfully.
- Bake to Perfection:
- Pop your pan into the preheated oven and bake for about 33–36 minutes. You’ll know they’re ready when the center is just set, and a toothpick inserted comes out with a few moist crumbs clinging to it.
- Cool and Cut:
- Let these beauties cool completely in the pan – I know it's hard to wait! Once totally cool, lift them out using the parchment paper and slice into perfect squares.
 Pin It
 One winter evening, after a particularly long and stressful week, I found myself instinctively baking these. The rhythmic stirring, the scent filling the house, and finally, that first bite of a perfectly cooled brownie felt like a warm hug. It wasn't just a dessert; it was a moment of peace, a reminder that sometimes the simplest pleasures can bring the greatest comfort, especially when shared with those you love.
The Magic of Temperature
Temperature plays a crucial role in baking these brownies. Room temperature eggs and softened cream cheese aren’t just suggestions; they ensure everything emulsifies properly, leading to a smooth, uniform batter and a beautifully textured swirl. Cold ingredients can cause your batter to seize and create an uneven bake. Think of it as gently coaxing ingredients to work together, rather than forcing them.
Achieving That Perfect Swirl
Creating the swirl is more art than science, and it’s surprisingly forgiving. Don’t overthink it; a few confident passes with a knife or skewer are all you need. You’re aiming for distinct streaks of red and white, not a fully mixed color. Practice makes perfect, and even a 'messy' swirl will taste absolutely delicious.
Storing Your Delights
These brownies keep wonderfully, which is a blessing because you might want to savor them over a few days. Storing them in an airtight container in the refrigerator is key to maintaining their freshness and that delightful fudginess. They even taste fantastic slightly chilled, though a quick warm-up to room temperature really brings out their rich flavors. It’s a dessert that continues to give.
- To enjoy them at their best, let them sit out for 15-20 minutes before serving after refrigeration.
- For longer storage, cut brownies can be frozen for up to 3 months; thaw overnight in the fridge.
- Always ensure they’re completely cool before covering to prevent condensation.
 Pin It
 These Red Velvet Brownies are truly a celebration in every bite, a perfect blend of comfort and elegance. Go ahead, bake a batch, and let their vibrant charm brighten your day and those of your loved ones.
Recipe Questions
- → How do I achieve the fudgy texture?
-
To ensure your squares are fudgy, avoid overbaking. The center should still be slightly moist and a toothpick inserted should come out with a few moist crumbs, not completely clean.
- → Can I substitute the red food coloring?
-
While red food coloring gives the classic vibrant hue, you can reduce or omit it. The flavor won't be affected, but the color will be a darker brown with a hint of red.
- → What's the best way to swirl the cream cheese?
-
After dolloping the cream cheese and reserved batter, use a knife or skewer to gently cut through the layers in a figure-eight or zigzag pattern. Don't overmix, or the distinct layers will disappear.
- → How should I store leftover squares?
-
Store them in an airtight container in the refrigerator for up to 5 days. They can be enjoyed chilled or brought to room temperature before serving.
- → Can I add mix-ins to the batter?
-
Yes, for added richness, you can fold in about 1/2 cup of white chocolate chips into the brownie batter before spreading it into the pan.
- → My cream cheese mixture is lumpy, what went wrong?
-
Ensure your cream cheese is well softened to room temperature. Beat it thoroughly with the sugar, egg yolk, and vanilla until it's completely smooth before adding it to the batter.
