 Pin It
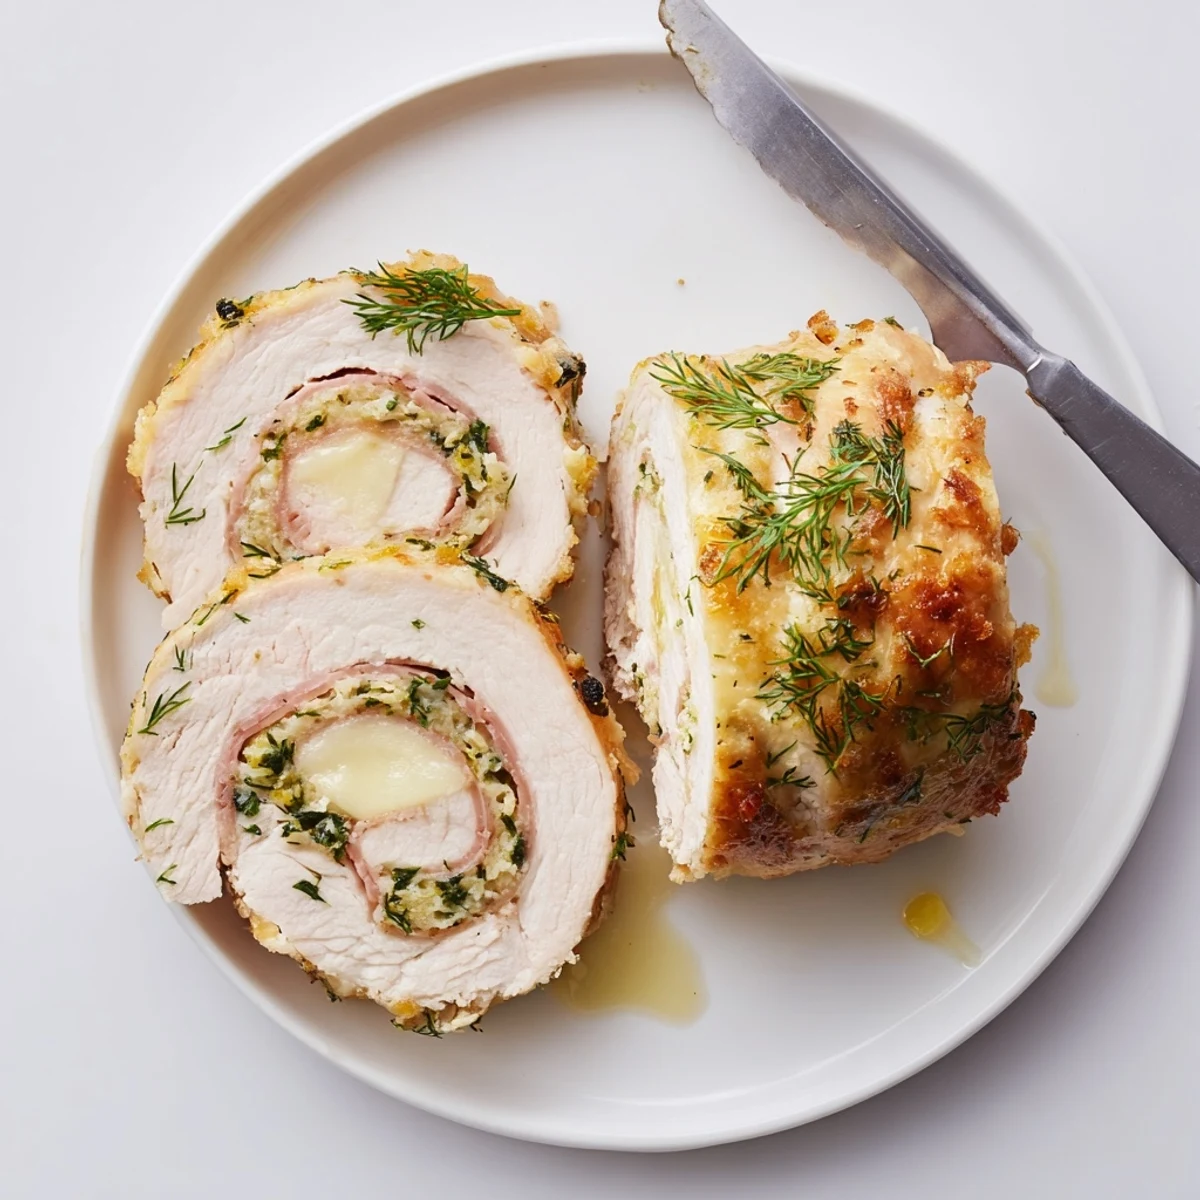
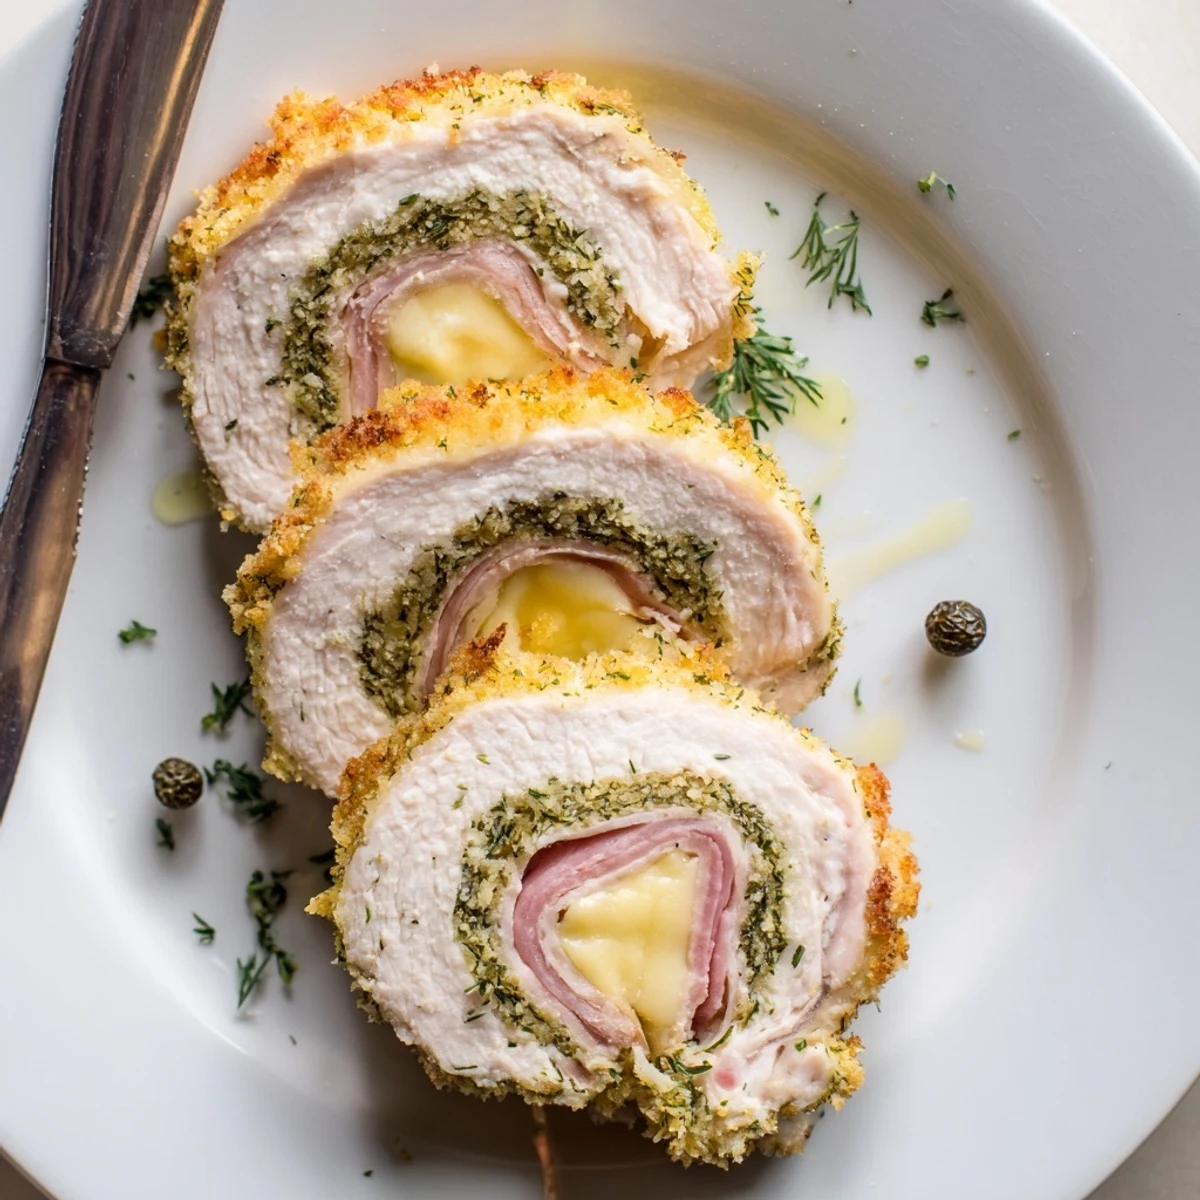
 Brine chicken breasts in dill pickle juice to add tang and tenderize, then butterfly and pound thin. Layer each with Swiss or provolone, add ham if desired and chopped dill or parsley, roll tightly and secure. Set up flour, egg and panko station, dredge and coat. Pan-fry briefly to brown and finish in a hot oven, or bake until golden and cooked through. Rest before slicing and serving.
The smell of pickle juice hit me wrong the first time I poured it over raw chicken, and my husband leaned into the kitchen doorway asking if something had gone terribly wrong in my refrigerator. Two hours later, he was scraping his plate clean and asking when I would make it again. That is the strange magic of pickle brined chicken rolls: they sound questionable and taste extraordinary.
I served these at a small backyard gathering last summer, and my friend Rachel stood over the baking sheet eating slices straight off the tray before I could even get them to the table.
Ingredients
- Pickle juice (1 cup): Use the juice straight from a jar of dill pickles, and do not be shy about it.
- Sugar (1 tablespoon): Just enough to round off the sharpness of the brine without making anything sweet.
- Black peppercorns (1 teaspoon): Whole peppercorns infuse gently during brining instead of overwhelming the meat.
- Chicken breasts (4 boneless, skinless): Pound them evenly so they roll without cracking and cook uniformly.
- Swiss or provolone cheese (4 slices): Provolone melts into a beautiful stretch, while Swiss adds a slightly nutty depth.
- Deli ham (4 slices, optional): This adds a salty, smoky layer that turns the roll into something closer to cordon bleu.
- Fresh dill or parsley (2 tablespoons, chopped): Fresh herbs brighten the rich filling and echo the dill from the brine.
- Salt and black pepper: Go easy on the salt since the brine and cheese already bring plenty.
- All-purpose flour (1 cup): The base coat that helps the egg and breadcrumbs stick properly.
- Eggs (2 large, beaten): The glue that holds your crispy exterior together.
- Panko breadcrumbs (1 and 1/2 cups): Panko gives you that light, shattering crunch that regular breadcrumbs cannot match.
- Garlic powder (1 teaspoon): Distributes evenly across the coating for consistent flavor in every bite.
- Smoked paprika (1/2 teaspoon): Adds a whisper of smoke that plays beautifully with the tangy brine.
- Vegetable oil or melted butter (1/4 cup): For frying or drizzling over the rolls before baking to encourage browning.
Instructions
- Brine the chicken:
- Combine the pickle juice, sugar, and peppercorns in a large bowl or resealable bag, then submerge the chicken breasts and refrigerate for at least 1 hour or up to 4 hours for deeper flavor.
- Prep for cooking:
- If baking, preheat your oven to 400 degrees F and line a baking sheet with parchment paper so nothing sticks.
- Flatten the breasts:
- Remove the chicken from the brine, pat it dry, butterfly each breast by slicing horizontally almost through, then open it flat and pound between plastic wrap to an even quarter inch thickness.
- Build the rolls:
- Lay a slice of cheese, then ham if using, and a sprinkle of fresh herbs on each flattened breast, season lightly, then roll tightly tucking the sides in and securing with toothpicks.
- Set up breading station:
- Arrange three shallow bowls with flour in the first, beaten eggs in the second, and panko mixed with garlic powder and smoked paprika in the third, keeping one hand dry and one wet to avoid breading your own fingers.
- Coat the rolls:
- Dredge each chicken roll through flour first, then dip into egg, and finally press firmly into the panko mixture making sure every surface is well coated.
- Cook until golden:
- For frying, heat oil in a skillet over medium heat and brown the rolls on all sides for about 3 to 4 minutes per side before transferring to the oven for 15 minutes, or for baking only, arrange on the prepared sheet, drizzle with melted butter or oil, and bake 25 to 30 minutes until deeply golden and cooked through.
- Rest and serve:
- Let the rolls rest for 5 minutes so the cheese settles, then slice into pinwheels and serve while hot and crunchy.
 Pin It
 The first time I pulled these golden rolls from the oven and sliced one open to reveal the spiraled cheese and herbs inside, I felt like I had stumbled onto something that belonged on a restaurant menu rather than my Tuesday night dinner table.
What to Serve Alongside
A scoop of cold potato salad and a pile of crunchy coleslaw balance the richness of these rolls perfectly, and a simple green salad with a vinaigrette cuts through the cheese like nothing else.
Making It Your Own
Try using spicy pickle juice for an unexpected kick, or swap the ham for prosciutto when you want something a little fancier for company.
Getting Ahead and Storing
You can assemble and bread the rolls up to a day in advance and keep them covered in the refrigerator, which makes them a surprisingly practical option for entertaining.
- Leftover slices reheat beautifully in a 375 degree oven for about 10 minutes.
- Air fryers work wonders for reheating and restoring the crunch.
- Freeze cooked rolls individually wrapped in foil for up to one month.
 Pin It
 These rolls turned a skeptical husband into a believer and a casual dinner into a request for seconds, which is really all any recipe needs to accomplish.
Recipe Questions
- → How long should I brine the chicken?
-
Brine for at least 1 hour and up to 4 hours in the refrigerator. Shorter brines add mild tang; longer brines tenderize more but avoid over-brining to prevent an overly salty or soft texture.
- → What type of pickles work best for the brine?
-
Dill pickle juice is classic for its herbal tang. For a spicier note try spicy dill; sweet pickle juice will mellow the tang. Use the jarred juice rather than bottled brine for best flavor.
- → Can I use a different cheese or omit the ham?
-
Yes. Swiss, provolone or mozzarella melt well; sharper cheeses add more punch. Swap ham for prosciutto or omit entirely for a lighter roll—add extra herbs for flavor.
- → Should I fry or bake the rolls?
-
Pan-frying briefly gives a deeper golden crust, then finishing in the oven ensures cooked-through centers. Baking only is cleaner and still yields a crisp exterior if you brush with oil or melted butter and use panko.
- → How do I make this gluten-free?
-
Use gluten-free all-purpose flour and gluten-free breadcrumbs or crushed cornflakes for the coating. Ensure any deli meats or cheese are labeled gluten-free to avoid cross-ingredients.
- → How should I store and reheat leftovers?
-
Refrigerate cooled rolls in an airtight container for up to 3 days. Reheat in a 350°F (175°C) oven until warmed through to maintain crispness; avoid microwaving if you want to keep the coating crisp.
