 Pin It
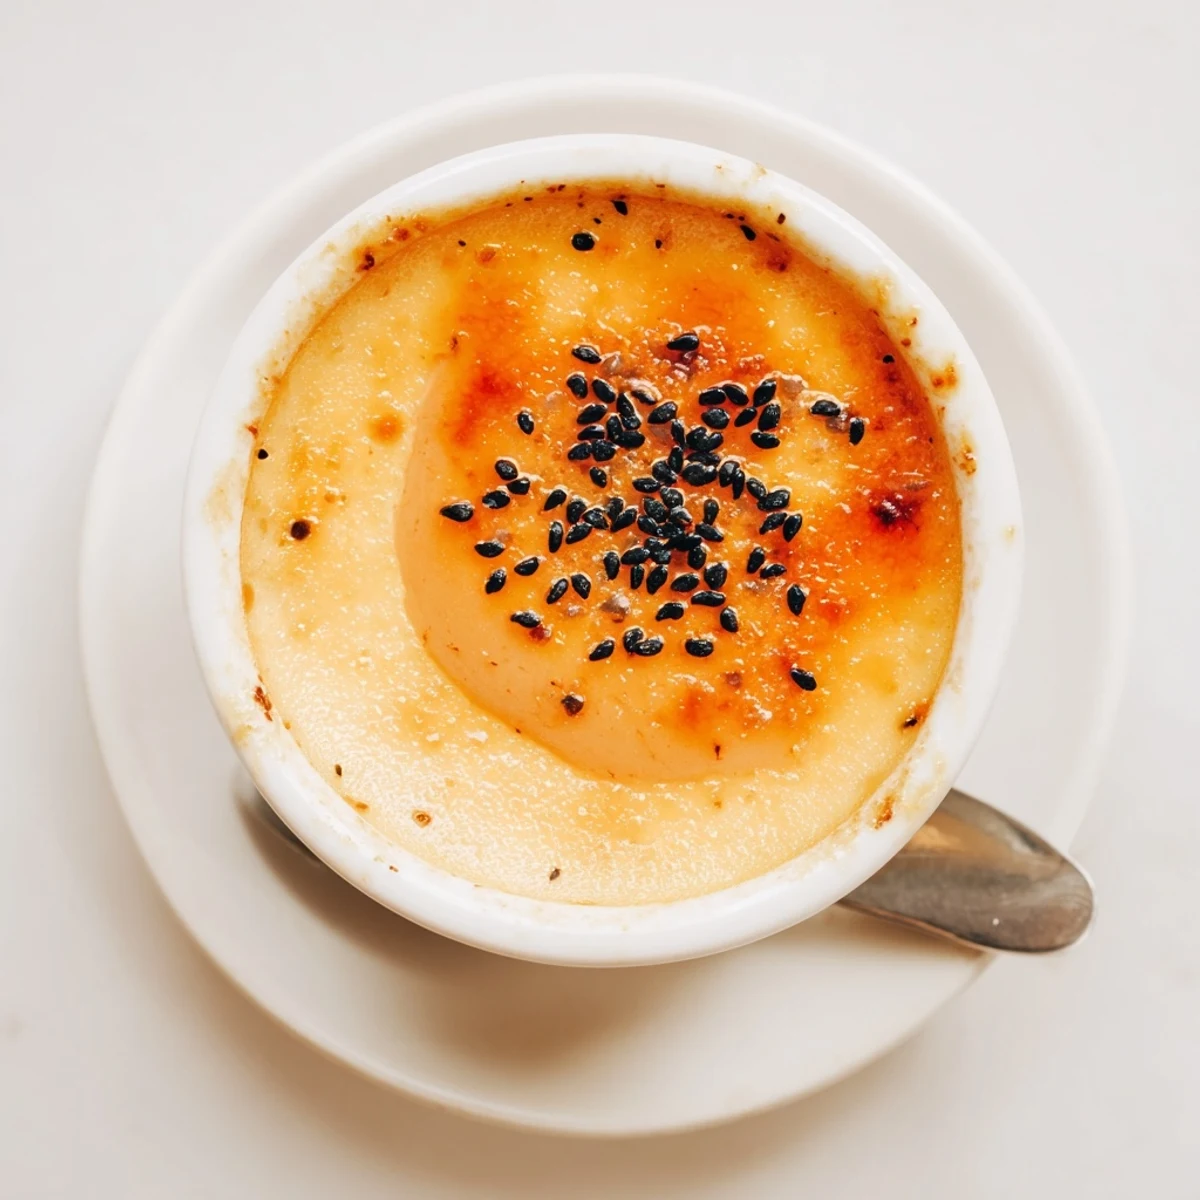
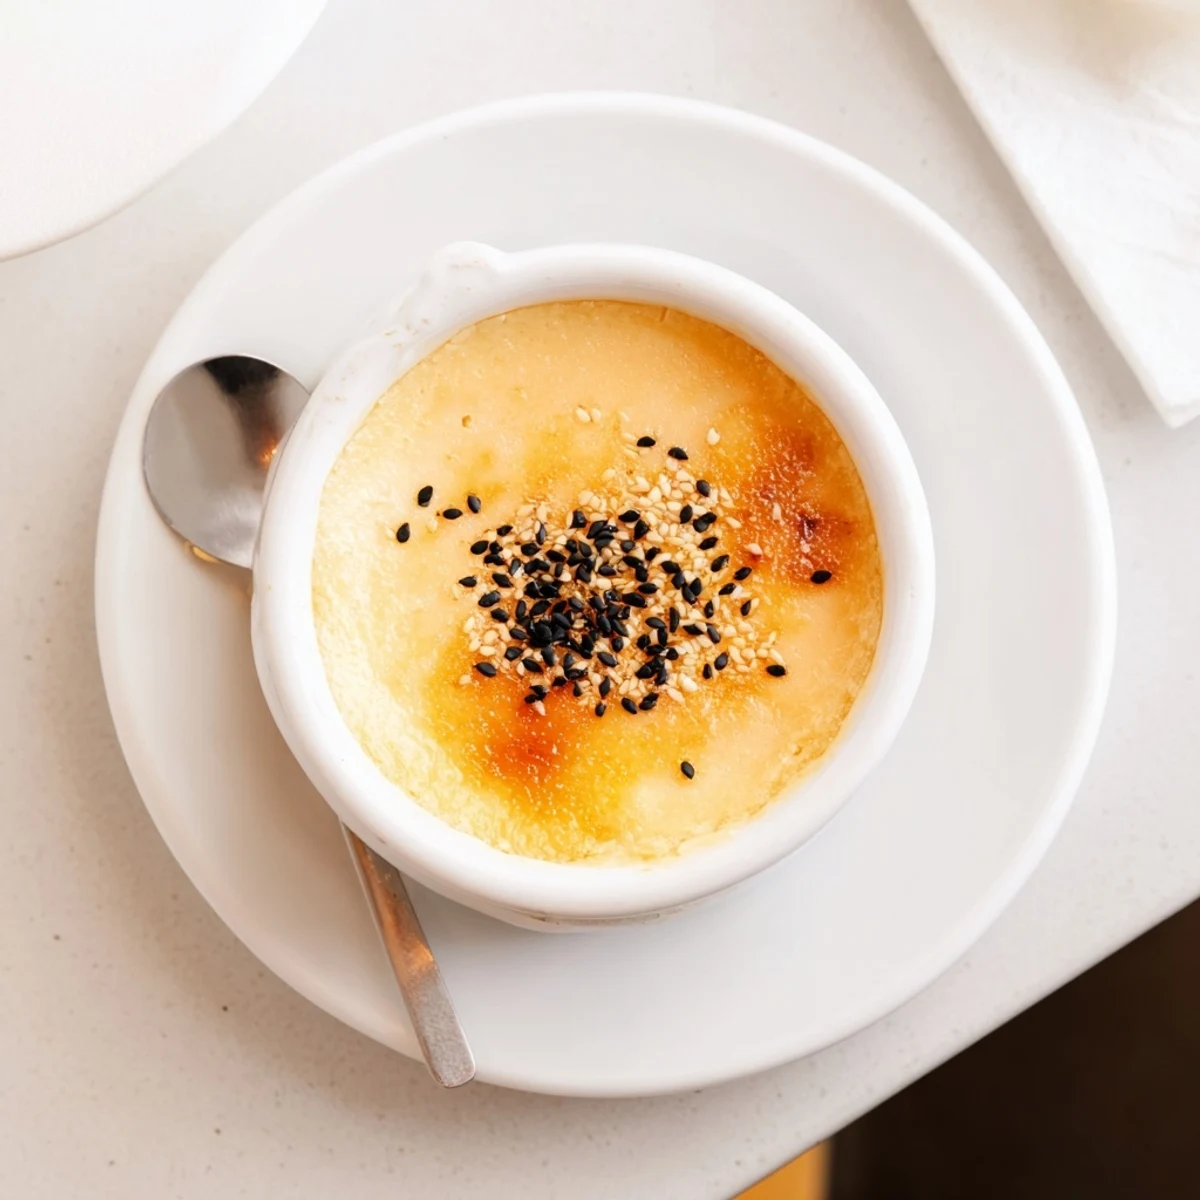
 This elegant fusion dessert marries the velvety smoothness of traditional French custard with the natural sweetness and nutty undertones of Japanese sweet potato. The result is a beautifully balanced treat that's both familiar and wonderfully unique. The vibrant orange-purple sweet potato creates a stunning visual presentation while infusing the classic custard with subtle earthy notes that perfectly complement the rich cream and egg base. The hallmark crackling sugar crust adds essential textural contrast and caramel complexity to each spoonful.
Perfect for dinner parties or special occasions, this dessert requires minimal active preparation but delivers maximum sophistication. The water bath technique ensures perfectly set, silky custards every time, while the final torching creates that signature brûlée experience guests love.
The first time I made this was during a rainy autumn weekend when I had too many Japanese sweet potatoes from my CSA box and a sudden craving for something creamy and comforting. I was skeptical about combining the earthy sweetness of satsumaimo with the classic French custard, but one spoonful of that burnt sugar cracking into the silky purple-tinged cream erased all doubts. Now it is the dessert I make when I want to impress people without spending hours fussing over pastry or complicated techniques.
I served these at a small dinner party last fall, and my friend Sarah who claims to hate desserts spent ten minutes scraping every bit of caramel from her ramekin. Something about that earthy undertone beneath the burnt sugar makes people pause and ask what exactly they are eating, in the best way possible.
Ingredients
- Japanese sweet potato: The purple-skinned variety has a natural sweetness and chestnut-like flavor that regular sweet potatoes cannot match
- Heavy cream and milk: The combination creates richness without being overwhelming
- Egg yolks: Room temperature yolks incorporate more smoothly into the custard base
- Granulated sugar: Divide this between the custard and the caramelized topping
- Vanilla extract: Pure vanilla makes a noticeable difference in the final flavor
Instructions
- Prepare the sweet potato:
- Cube and steam the potato until it falls apart when pressed with a fork, about 15 minutes. Let it cool slightly so it does not curdle the dairy when blended.
- Make the custard base:
- Blend the warm potato with cream and milk until absolutely smooth with no bits remaining. The texture should be like heavy cream itself.
- Whisk the yolks:
- Beat egg yolks with sugar, vanilla and salt until the mixture turns pale yellow and slightly thickened.
- Combine and strain:
- Slowly pour the sweet potato cream into the yolks while whisking constantly, then strain through a fine mesh sieve. This step ensures no lumps remain.
- Bake with care:
- Divide among four ramekins, set them in a water bath, and bake at 300°F until just set with a slight wobble in the center.
- Chill thoroughly:
- Cool to room temperature before refrigerating for at least two hours or overnight for the best texture.
- Create the brûlée:
- Sprinkle an even layer of sugar over each chilled custard and torch until deeply amber and bubbling.
 Pin It
 My brother-in-law who never eats dessert asked me to teach him how to make these for his wife's birthday. That earthy sweetness somehow feels sophisticated without being pretentious, the kind of thing that makes people linger at the table longer than they planned.
Getting The Texture Right
The difference between a silky custard and a grainy one often comes down to blending the sweet potato thoroughly enough. I learned this the hard way when my first batch had tiny potato flecks that disrupted the smooth mouthfeel. Now I blend the potato with the dairy for longer than seems necessary, running the machine for a full minute and checking for any bits before moving on.
The Sugar Topping Secret
After years of making crème brûlée, I discovered that letting the torched sugar rest for exactly three minutes creates the most satisfying crack. Too soon and it is still sticky, too long and it starts to weep into the custard. Also, an even layer of sugar about one-eighth inch thick gives you that perfect sheet of caramel rather than spotty patches.
Make Ahead Wisdom
You can prepare the custards up to two days in advance and keep them covered in the refrigerator. The texture actually improves slightly after a night in the fridge. Only add the sugar topping right before serving.
- Press plastic wrap directly onto the surface to prevent a skin from forming
- Let refrigerated custards sit at room temperature for 10 minutes before broiling the sugar
- Clean any sugar drips from the ramekin edges immediately after torching while still warm
 Pin It
 There is something deeply satisfying about breaking through that burnt sugar shell into the cool, creamy custard beneath. This dessert has become my go-to for quiet celebrations and memorable meals alike.
Recipe Questions
- → What makes Japanese sweet potato different from regular varieties?
-
Japanese sweet potatoes have a naturally sweet, nutty flavor with a creamy, slightly floury texture when cooked. Their distinctive purple-red skin and pale yellow flesh contain more natural sweetness than orange-fleshed varieties, making them ideal for desserts without requiring excessive added sugar.
- → Can I make this dessert ahead of time?
-
Absolutely. The custards can be prepared up to 2 days in advance and stored covered in the refrigerator. The caramelized sugar topping should be added just before serving, as humidity will cause the crisp crackle to soften over time. The custard base actually benefits from resting overnight, allowing flavors to meld and deepen.
- → Do I need a kitchen torch for the caramelized top?
-
While a kitchen torch provides the easiest and most controlled method for creating the signature crackling sugar crust, you can also use your oven's broiler. Place the chilled custards under the preheated broiler for 1-2 minutes, watching constantly to prevent burning. The broiler method creates a slightly softer caramel layer but still delivers delicious results.
- → Why is straining the custard mixture important?
-
Straining through a fine mesh sieve removes any potential lumps, sweet potato fibers, or bits of cooked egg that might have formed during mixing. This extra step ensures an impeccably smooth, silken texture throughout the custard. It takes just a moment but makes a noticeable difference in the final dessert's professional-quality consistency.
- → Can I substitute the dairy ingredients?
-
Yes, full-fat coconut cream works beautifully as a dairy-free alternative to heavy cream, though it will impart subtle coconut notes. For a lighter version, you can use half-and-half instead of heavy cream, though the custard will be slightly less rich. Avoid using skim milk or low-fat alternatives as they won't provide the necessary fat content for proper custard setting.
- → How do I know when the custards are properly baked?
-
The custards are done when they're just set around the edges but still slightly wobbly in the center—similar to gelatin. They should not be firm or liquid. Remember that residual heat will continue cooking them slightly after removal from the oven, and proper chilling completes the setting process. Overbaking will result in a rubbery, grainy texture instead of silky smoothness.
