 Pin It
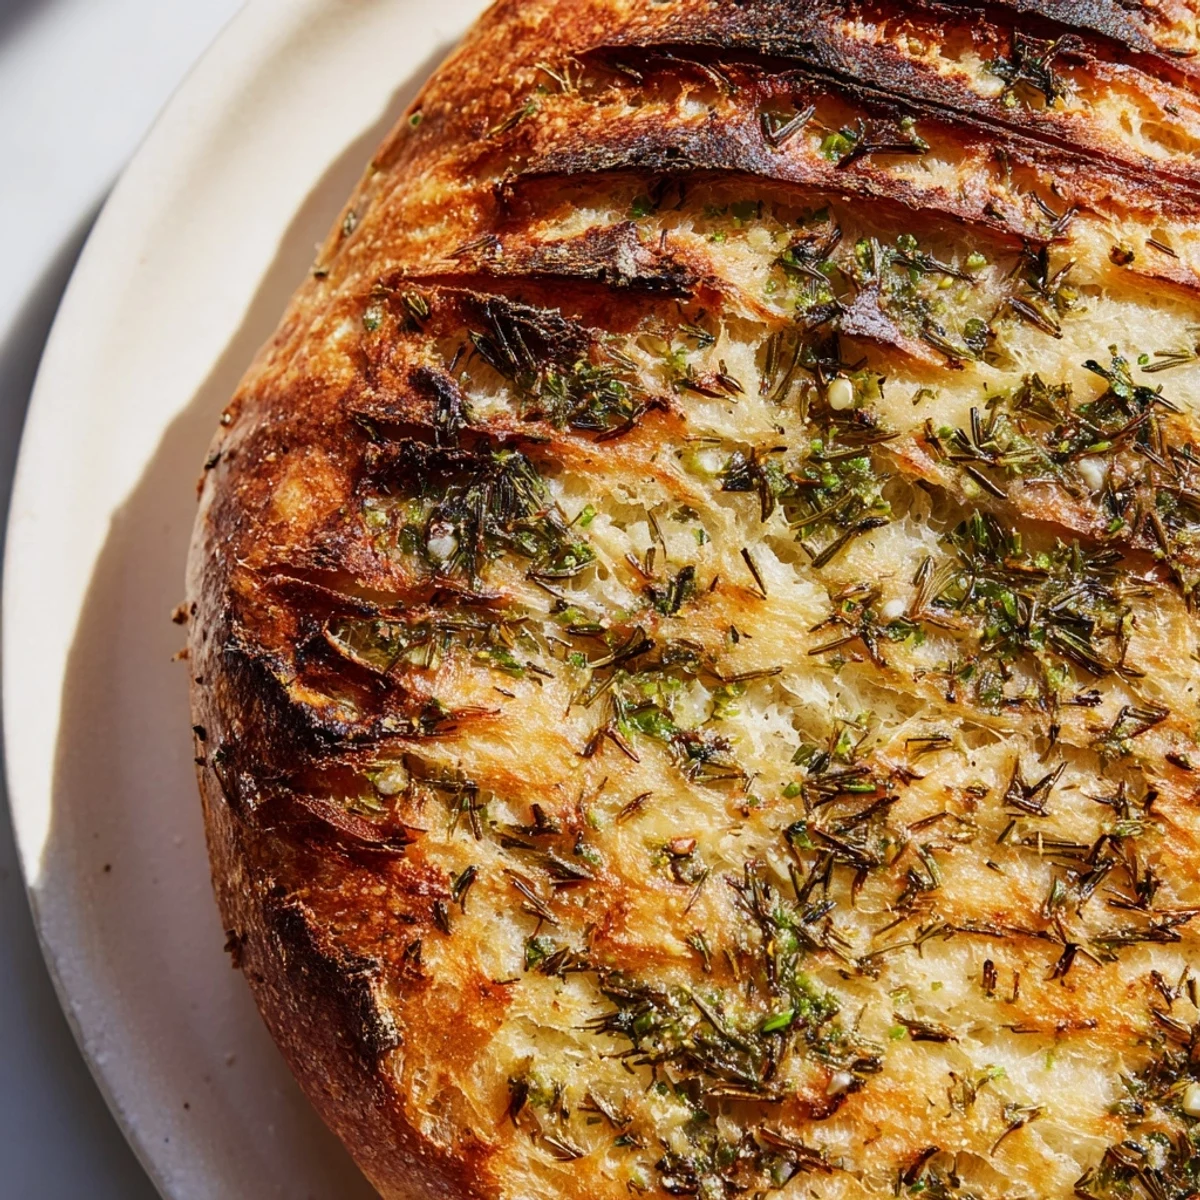
 This artisan-style bread combines aromatic garlic with fresh rosemary, thyme, and parsley for incredible flavor. The Dutch oven method creates a professional bakery result at home—producing a crackly, golden crust that protects the tender, airy crumb inside. Perfect alongside soups, salads, or simply dipped in quality olive oil.
The smell of garlic and rosemary hitting hot butter still takes me back to my tiny apartment kitchen, where I first discovered that making your own bread was not only possible but actually kind of magical. I had zero confidence and a dollar store mixing bowl, but when that crust crackled out of the oven, I felt like I had unlocked some ancient kitchen secret. Now this bread is my go-to for dinner parties, rainy weekends, and whenever I need my house to smell like an Italian bakery.
Last winter my neighbor texted at 7 PM asking if I had any bread because her daughter was suddenly craving garlic bread for a school project. I threw this together in my pajamas, and when they came over to pick it up, the three of us stood in the kitchen just tearing off warm pieces and eating it standing up. The mom looked at me and said this was better than any restaurant bread she had ever had, and honestly, I felt like a kitchen superhero.
Ingredients
- Bread flour: The higher protein content creates that beautiful chewy texture and structure, but all purpose works in a pinch
- Salt: Do not reduce this amount, salt is what keeps the yeast from going crazy and controls the fermentation
- Sugar: Just a tiny bit helps feed the yeast and gives the crust that gorgeous golden color
- Active dry yeast: Make sure your water is warm but not hot, like a nice baby bath, around 110°F
- Warm water: This activates the yeast and creates the steam that gives you those gorgeous air pockets
- Olive oil: Keeps the dough tender and makes it easier to handle without sticking to everything
- Garlic cloves: Fresh minced garlic distributes better than garlic powder and creates those incredible aromatic pockets
- Fresh rosemary: Woody herbs like rosemary hold up beautifully during baking and infuse every bite
- Fresh thyme: Adds an earthy undertone that balances the sharp garlic perfectly
- Fresh parsley: Brings brightness and color, plus that extra sprinkle on top makes it look bakery worthy
- Melted butter: Brushing this on right after baking is what makes the crust glossy and irresistible
Instructions
- Mix the dry foundation:
- Grab your largest mixing bowl and whisk together the bread flour, salt, and sugar until they are one happy family, then stir in the yeast like you are introducing it to its new best friends.
- Bring it together:
- Pour in the warm water and olive oil, then grab a wooden spoon and start stirring until you have a sticky, shaggy dough that looks like a mess but is actually exactly right.
- Add the flavor:
- Fold in the minced garlic and chopped herbs until they are distributed throughout, then cover the bowl with plastic wrap or a damp towel and walk away for 2 hours.
- Shape your loaf:
- Turn the dough onto a lightly floured surface and gently tuck the edges underneath to form a round, then place it on a piece of parchment paper and let it rest for another 30 minutes while your oven preheats.
- Get your oven ready:
- Place your Dutch oven with its lid on in the oven and preheat to 450°F for at least 30 minutes, because that pot needs to be screaming hot to create the steam that makes artisan bread magical.
- The moment of truth:
- Carefully lift the dough by the parchment paper and lower it into the hot Dutch oven, score the top with a sharp knife, cover with the lid, and bake for 30 minutes before removing the lid and baking for another 15 to 20 minutes until the crust is deep golden brown.
- The finishing touch:
- Brush the hot bread with melted butter and sprinkle with extra fresh herbs, then let it cool for at least 20 minutes before slicing, though I will not judge if you tear into it immediately.
 Pin It
 My brother in law, who is basically a human garbage disposal and will eat anything, took one bite of this bread and literally stopped talking for a full minute. Now every time I visit, there is a subtle but pointed request about whether I am bringing the bread, and I have learned to always make two loaves because one mysteriously disappears before dinner is even served.
Choosing Your Herbs
I have experimented with every herb combination under the sun, and while the classic rosemary, thyme, and parsley trio is unbeatable, do not be afraid to play around. Fresh oregano and basil give it an Italian twist, while chopped sage and thyme make it feel more autumnal and cozy. The key is using fresh herbs whenever possible, because dried herbs can burn and turn bitter during the long bake.
Timing Your Bake
The beauty of this dough is that you can mix it up in the morning, let it rise while you run errands, and bake it whenever you are ready. I have even let it rise in the refrigerator for a slow, overnight fermentation, which develops incredible flavor. The dough is incredibly forgiving, which is exactly what you want when you are getting comfortable with bread making.
Serving Suggestions
This bread is basically a meal on its own when it is fresh out of the oven, but it also makes the most incredible garlic bread for pasta night. I love slicing it thick and toasting it for bruschetta, or cubing and baking it for croutons that will ruin you for store bought forever.
- Dip it in good olive oil with balsamic vinegar
- Use it for the ultimate grilled cheese sandwich
- Turn stale leftovers into the best bread pudding you have ever had
 Pin It
 There is something deeply satisfying about pulling a homemade loaf from the oven, and the way this bread perfumes your entire house is better than any candle. Grab a slice while it is still warm, maybe slather it with a little extra butter, and know that you have just made something beautiful.
Recipe Questions
- → Can I use dried herbs instead of fresh?
-
Yes, substitute 1 teaspoon each of dried rosemary, thyme, and parsley for the fresh herbs. Dried herbs are more concentrated, so you'll need smaller amounts.
- → Why bake bread in a Dutch oven?
-
The Dutch oven traps steam from the dough, creating a humid environment that allows the bread to expand fully while developing a thick, crispy crust. It mimics professional steam-injected ovens.
- → How do I know when the bread is done?
-
The crust should be deep golden brown, and the bread should sound hollow when tapped on the bottom. An instant thermometer inserted into the center should read 190-200°F.
- → Can I make this dairy-free?
-
Replace the butter for brushing with additional olive oil or melted coconut oil. The dough itself contains no dairy aside from the optional finishing butter.
- → How should I store this bread?
-
Store in a paper bag at room temperature for up to 2 days. For longer storage, wrap tightly and freeze for up to 3 months. Avoid plastic bags, which make the crust soggy.
