 Pin It
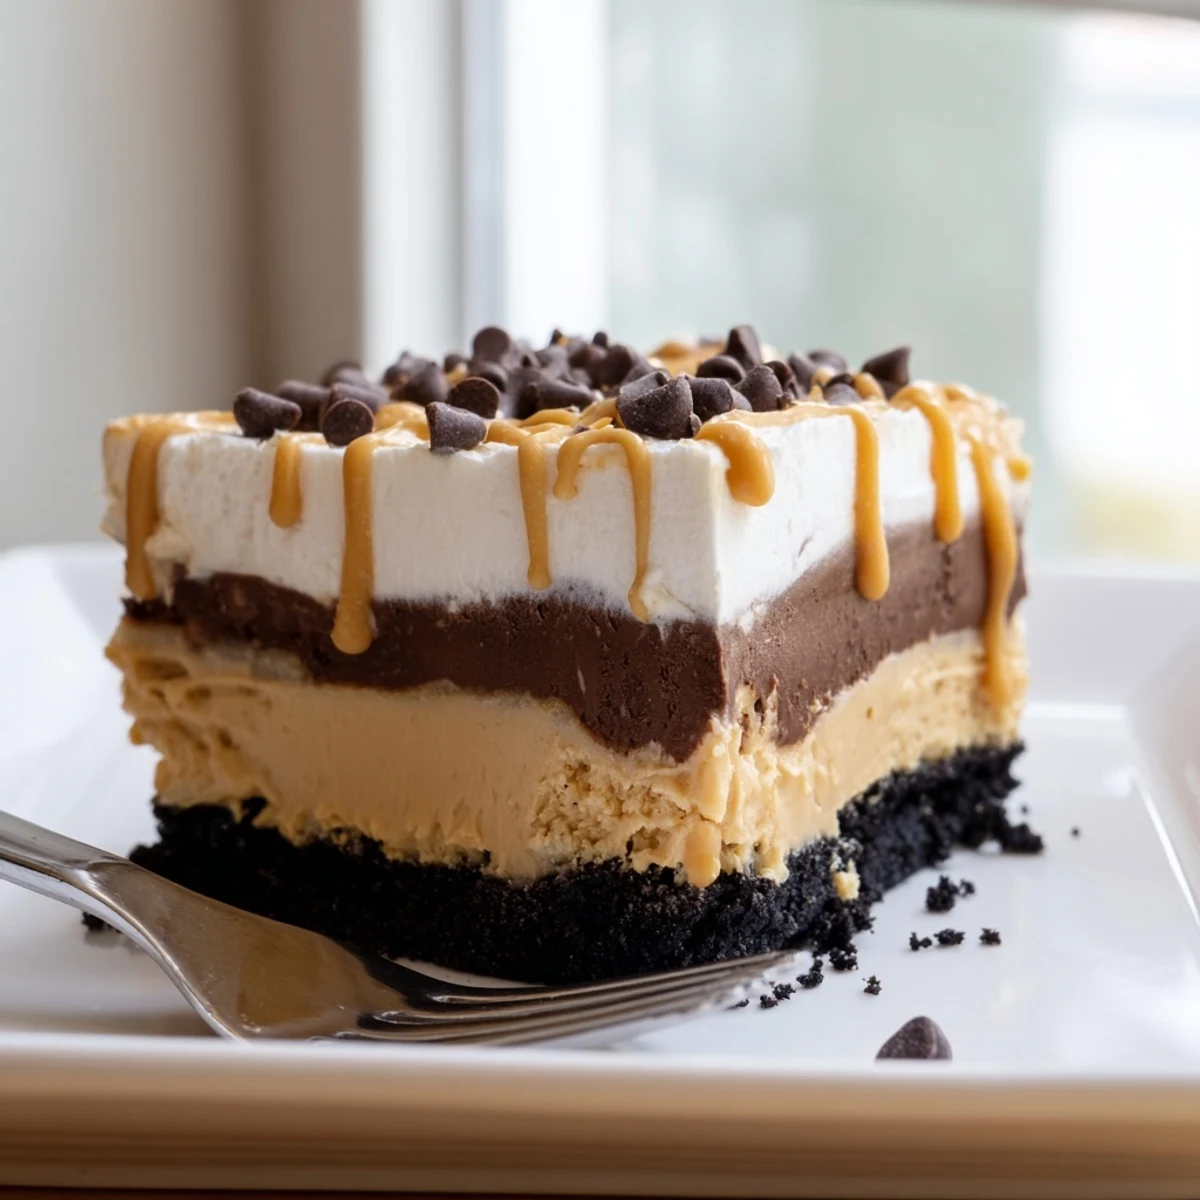
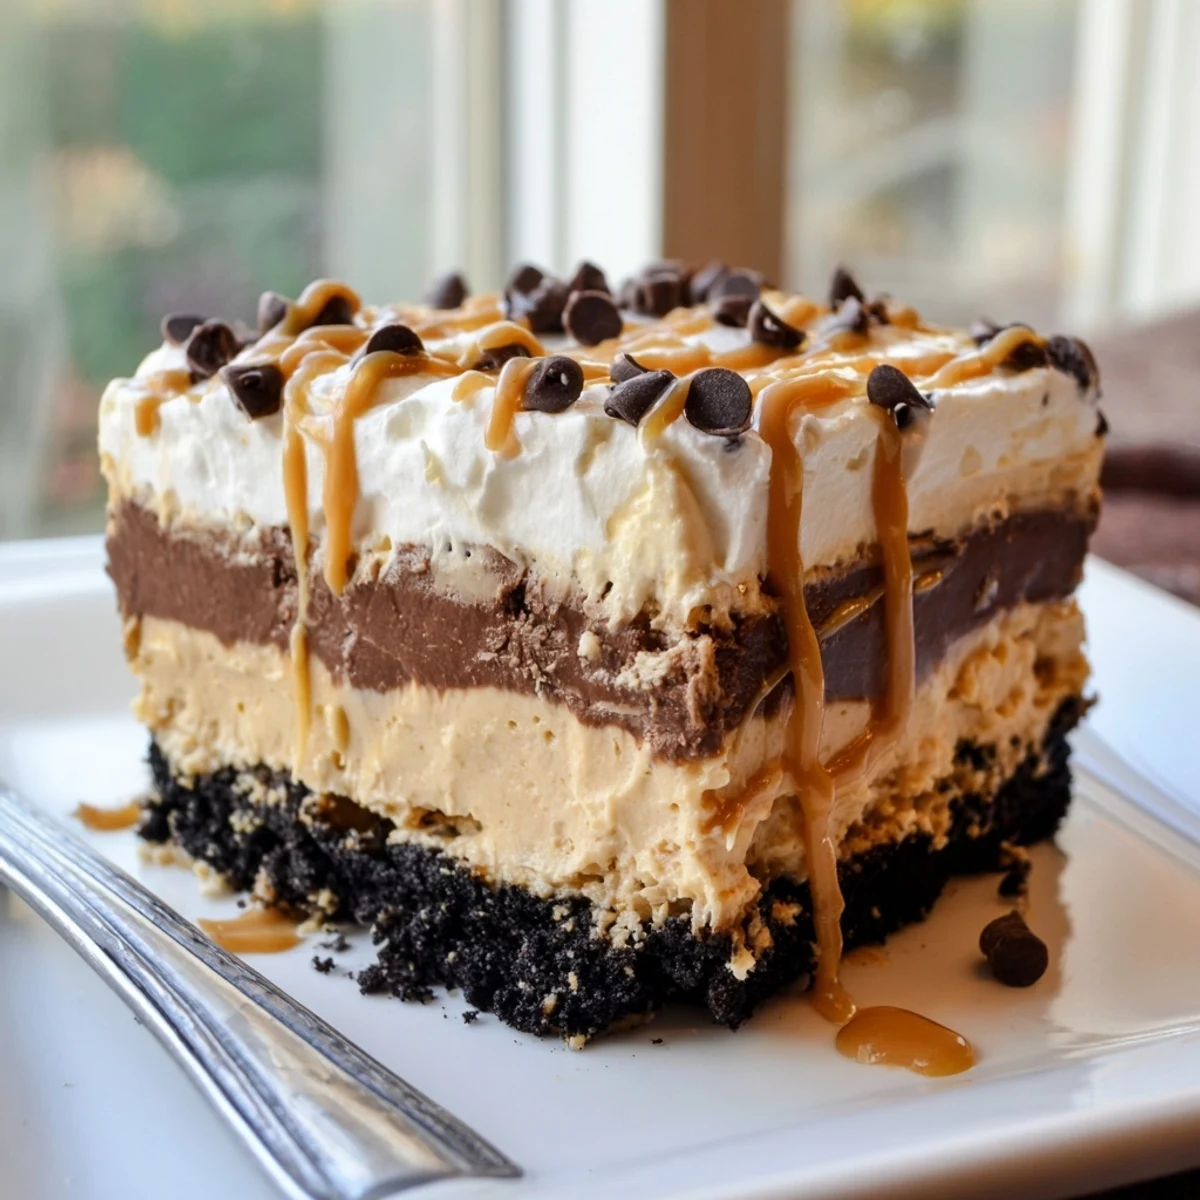
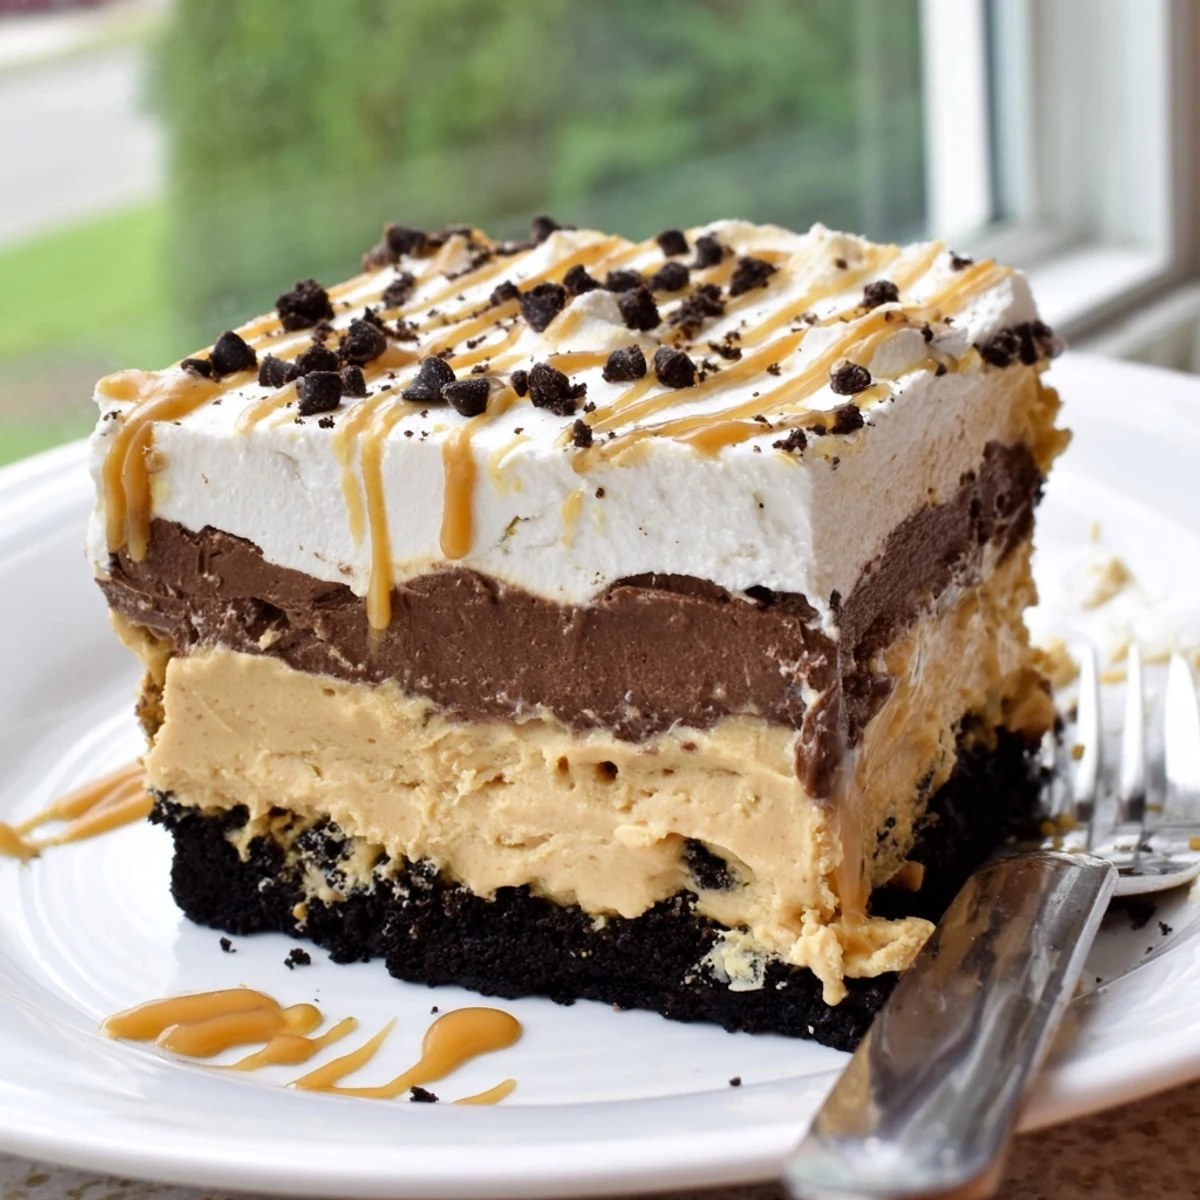
 This no-bake peanut butter layered delight brings together a buttery chocolate cookie crust, a fluffy peanut butter cream cheese filling, rich chocolate pudding, and a cloud of whipped topping. Simply press the crust, mix and spread each layer, then chill until set.
Ready in just 25 minutes of hands-on time, it's an effortless make-ahead dessert that serves eight and satisfies every peanut butter craving.
The summer I discovered this dessert, my kitchen was a disaster zone of failed experiments and flour dusted countertops, but this layered beauty came together so effortlessly that I actually laughed out loud while spreading the peanut butter filling. It requires zero oven time, which was a blessing since my ancient apartment air conditioner had already surrendered to the August heat. Something about pressing those crushed cookies into the pan felt oddly therapeutic, like solving a delicious puzzle. Within hours, I had a dessert that looked like it came from a bakery window and tasted like pure comfort.
I brought this to a potluck at my friends house last Fourth of July, and before I even set the dish down, three people had already asked what was inside it. My buddy Dave, who claims to hate peanut butter, ate two squares before admitting defeat and asking for the recipe. The pan was scraped clean before the fireworks even started, and someone actually licked the serving spoon when they thought nobody was looking.
Ingredients
- 200 g chocolate sandwich cookies (about 20 cookies), crushed: The crust is the foundation, and using a food processor gives you the finest crumbs that hold together best when combined with butter.
- 75 g unsalted butter, melted: This binds the cookie crumbs into a crust that firms up beautifully in the fridge without turning hard as a rock.
- 225 g cream cheese, softened: Make sure it is truly at room temperature or you will fight lumps in your peanut butter layer, a mistake I have made more times than I care to admit.
- 120 g creamy peanut butter: Use a standard commercial peanut butter like Skippy or Jif rather than natural varieties, because the stabilizers help the layer set properly.
- 100 g powdered sugar: This sweetens the peanut butter filling and gives it that smooth, pipeable consistency.
- 480 ml whipped topping total, divided: Half gets folded into the peanut butter layer for airiness and the other half crowns the whole dessert like a cloud.
- 1 package (100 g) instant chocolate pudding mix: The instant variety is essential here since there is no cooking involved, and it sets up quickly in the fridge.
- 375 ml cold milk: Cold milk whisks into the pudding mix faster and helps it thicken within minutes.
- 2 tbsp peanut butter, melted, plus chocolate shavings (optional): These finishing touches turn a simple layered dessert into something that looks professionally done.
Instructions
- Build the crust:
- Toss the crushed cookies with melted butter until the mixture resembles wet sand, then press it firmly and evenly into the bottom of your baking dish using the back of a spoon or the flat bottom of a measuring cup.
- Whip up the peanut butter layer:
- Beat the softened cream cheese, peanut butter, and powdered sugar together until completely smooth with no visible streaks, then gently fold in half of the whipped topping until you have a light, moussey mixture. Spread this over the chilled crust in an even layer, taking your time to avoid disturbing the crust beneath.
- Make the chocolate pudding:
- Whisk the instant pudding mix and cold milk together for about two minutes until it thickens noticeably, then pour and spread it gently over the peanut butter layer. Work carefully so the two layers stay distinct and clean looking.
- Finish and freeze:
- Spread the remaining whipped topping over the pudding layer, then drizzle with melted peanut butter and sprinkle with chocolate shavings if you are feeling fancy. Cover the dish tightly and refrigerate for at least three hours so everything firms up into clean, sliceable layers.
 Pin It
 The moment this dessert truly won my heart was watching my niece carefully peel apart each layer with her fork, eating them one at a time, before looking up at me with chocolate smeared across her cheeks and declaring it the best thing she had ever tasted.
Making It Gluten Free
Gluten free chocolate sandwich cookies work beautifully as a substitute in the crust, and you would never notice the difference in the finished dessert. I tested this for a friend with celiac disease and she was genuinely shocked that the crust held together so well. Just double check the pudding mix label too, since some brands sneak wheat into unexpected places.
Swapping In Homemade Whipped Cream
If you prefer to skip the whipped topping, you can make homemade whipped cream by beating 480 ml of heavy cream with 30 g of powdered sugar and a splash of vanilla until stiff peaks form. The flavor is undeniably richer and fresher tasting, though the texture will be slightly softer and the dessert will need to be served within a day for the best results. I usually go this route when serving to company because the difference in taste is worth the extra effort.
Serving and Storage Wisdom
This dessert actually tastes better on the second day when the flavors have had time to meld and the crust has soaked up just a hint of moisture from the layers above. Run your knife under hot water and wipe it dry between each cut for the cleanest squares. Leftovers keep well covered in the fridge for up to four days, though they rarely last that long in my house.
- A sprinkle of chopped roasted peanuts between the peanut butter and pudding layers adds a wonderful crunch that surprises people in the best way.
- Let the dish sit at room temperature for about ten minutes before slicing if it has been chilling overnight, because the crust cuts more cleanly when slightly softened.
- Always store leftovers tightly covered in the refrigerator since the whipped topping will absorb fridge odors if left exposed.
 Pin It
 Some desserts are just food, but this one has a way of gathering people around the pan and sparking conversation before the first bite is even taken. Keep it in your back pocket for any occasion that calls for something sweet, simple, and universally adored.
Recipe Questions
- → Can I make this dessert ahead of time?
-
Yes, it actually benefits from being made ahead. Prepare it the day before and keep it covered in the refrigerator. The layers set beautifully overnight, making it even easier to slice and serve.
- → What can I substitute for whipped topping?
-
You can use an equal amount of homemade whipped cream. Whip 240 ml of heavy cream with a tablespoon of powdered sugar until stiff peaks form. It will yield a slightly richer, more decadent result.
- → How do I get clean slices when cutting?
-
Use a sharp knife and wipe the blade clean between each cut. Running the knife under hot water, then drying it before each slice, also helps achieve neat, bakery-style squares.
- → Can I use natural peanut butter instead of creamy?
-
Standard creamy peanut butter works best because it blends smoothly into the cream cheese layer. Natural peanut butter tends to separate and can make the filling less stable and slightly grainy.
- → How long does this dessert keep in the fridge?
-
Stored tightly covered in the refrigerator, it stays fresh for up to 4 days. The cookie crust may soften slightly over time, but the flavors continue to meld deliciously.
- → Is there a gluten-free option for the crust?
-
Absolutely. Swap the chocolate sandwich cookies for a gluten-free alternative. Many brands offer gluten-free chocolate sandwich cookies that work perfectly for the crust with no other changes needed.
