 Pin It
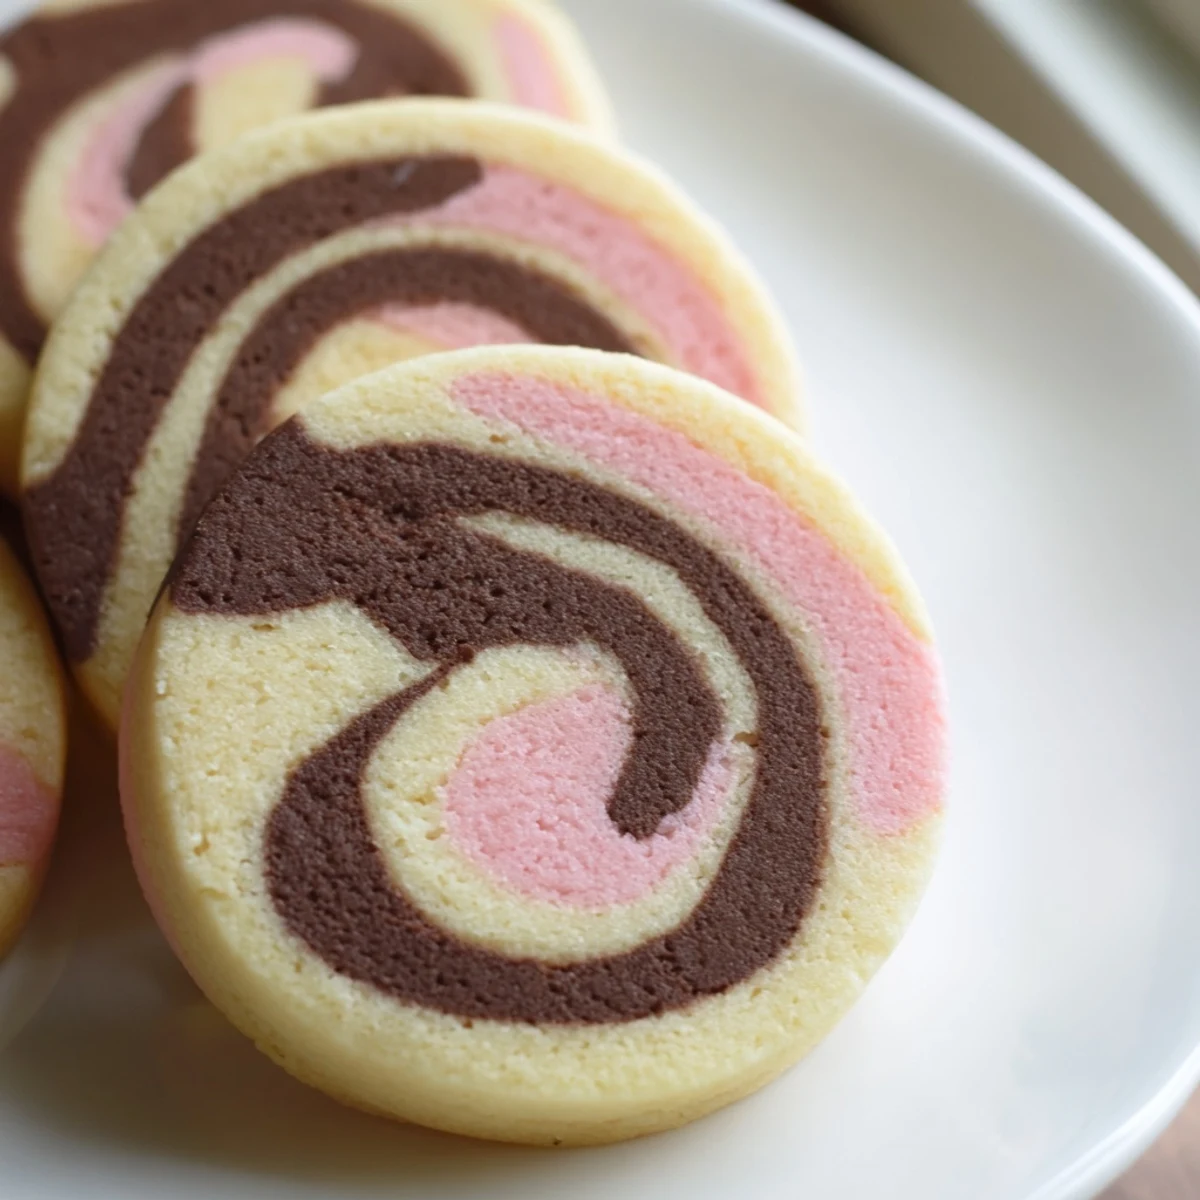
 Create stunning tri-colored treats with this classic Italian-American dessert. The dough divides into three portions: one blended with rich cocoa powder, another infused with freeze-dried strawberry for natural pink hue, and the third kept as classic vanilla. After chilling each layer separately, stack them and roll into a log before slicing into rounds that reveal perfect spirals when baked. The key to clean swirls is thorough chilling—rushing this step will blur the distinct layers. These keep beautifully for up to a week in an airtight container, though they rarely last that long.
Standing in my grandmother's kitchen, I watched her slice through a log of dough with the precision of a surgeon, revealing perfect spirals of chocolate, vanilla, and strawberry. She'd spent the entire afternoon carefully stacking and rolling those colorful layers, treating the process like an art form. When those Neapolitan Swirl Cookies emerged from the oven, I couldn't decide which flavor to try first, so I ate three in rapid succession. Now whenever I make these, I think about how something so visually stunning can taste even better than it looks.
Last Christmas, I brought a platter of these to my office cookie exchange, and within minutes they were gone. My coworker Sarah actually followed me back to my desk to ask for the recipe, saying her kids would go crazy for the pink swirls. What started as a nostalgic treat from my childhood has become my go-to whenever I need something that makes people smile before they even take a bite.
Ingredients
- 2 1/4 cups all-purpose flour: The foundation that gives these cookies their tender, melt-in-your-mouth texture
- 1/2 teaspoon baking powder: Just enough lift to make them soft without losing their perfect slice
- 1/4 teaspoon salt: Essential for balancing all that sweetness and making the flavors pop
- 3/4 cup unsalted butter, softened: Room temperature butter is crucial here for that creamy, perfect dough consistency
- 1 cup granulated sugar: Sweetens all three layers evenly without overpowering the delicate flavors
- 1 large egg: The binding agent that holds everything together beautifully
- 2 teaspoons vanilla extract: Use pure vanilla for the most authentic flavor in the plain layer
- 2 tablespoons unsweetened cocoa powder: Creates that rich, deep chocolate layer that contrasts perfectly with the other flavors
- 2 teaspoons freeze-dried strawberry powder: This gives real strawberry flavor instead of just artificial taste and color
- Pink food coloring: Optional, but I love how it makes that strawberry layer really stand out
Instructions
- Whisk the dry foundation:
- In a medium bowl, combine flour, baking powder, and salt until everything is evenly distributed and ready to join the wet ingredients
- Build the buttery base:
- Beat the softened butter and sugar together until they're light and fluffy, then add the egg and vanilla, mixing until the mixture looks smooth and glossy
- Form the perfect dough:
- Gradually add the flour mixture to your wet ingredients, mixing just until everything comes together into a soft, pliable dough that holds its shape
- Divide and conquer:
- Split your dough into three equal portions, setting each aside while you prepare to transform them into distinct flavors
- Make the chocolate layer:
- Mix cocoa powder thoroughly into one portion until it's a rich, uniform brown color with no streaks remaining
- Create the strawberry layer:
- Work the freeze-dried strawberry powder into another portion until evenly distributed, adding a drop of pink food coloring if you want that vibrant pink hue
- Roll into rectangles:
- Roll each dough portion between two sheets of parchment paper into matching rectangles about 10x6 inches, then chill them for 20 to 30 minutes until they're firm enough to handle
- Stack the flavors:
- Carefully layer your chilled dough sheets with chocolate on bottom, vanilla in the middle, and strawberry on top, pressing gently so they stick together
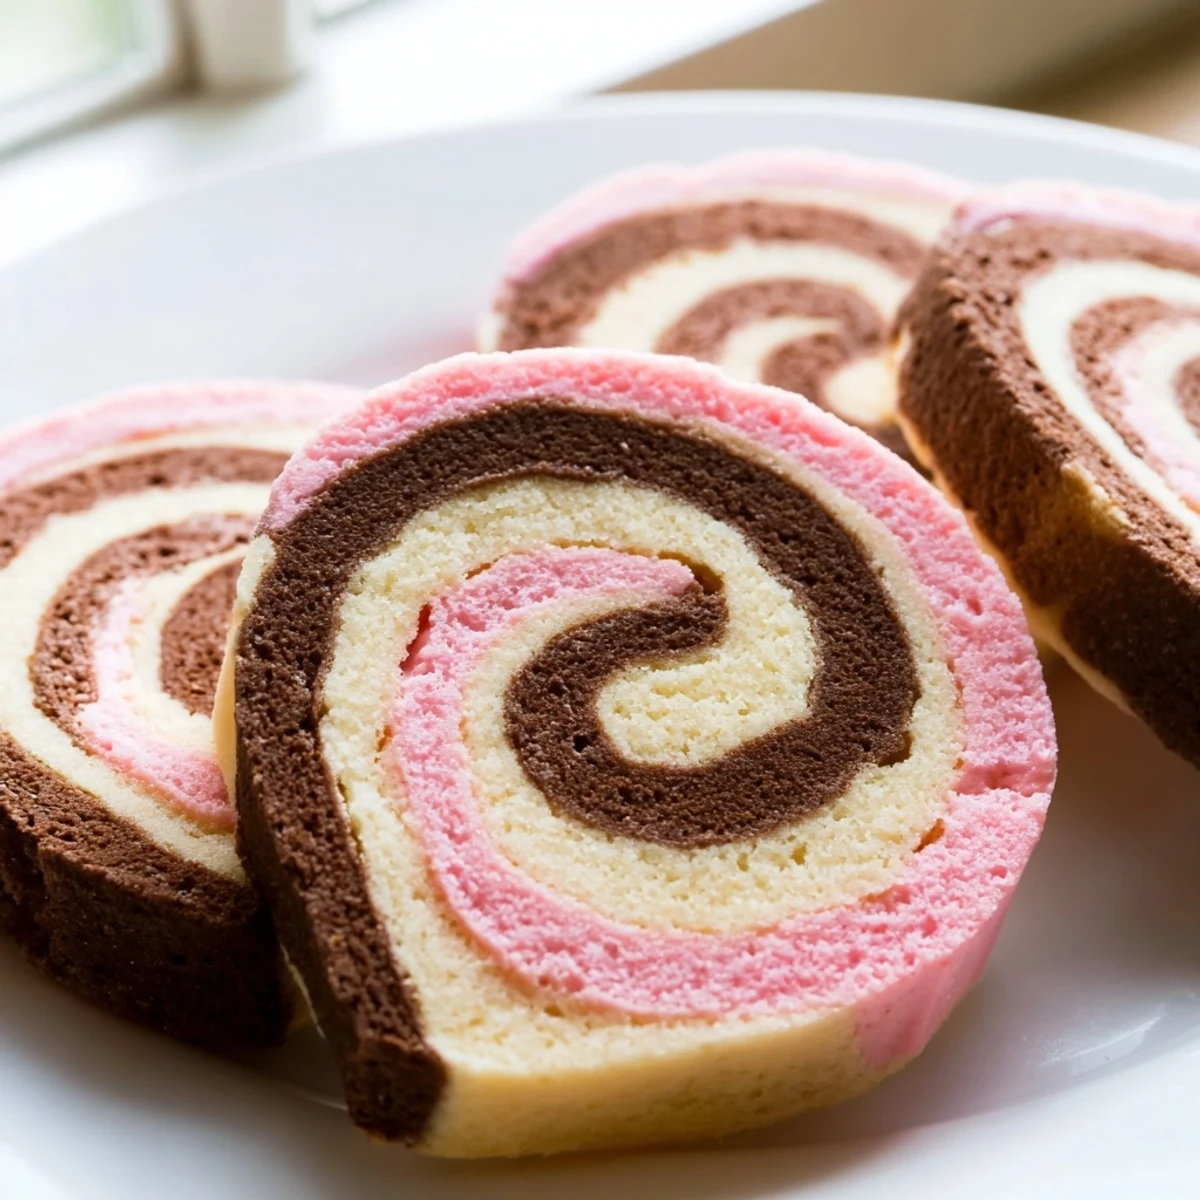
- Roll the spiral:
- Starting from one long edge, roll up your stacked dough into a tight log, then wrap it in plastic and chill for at least 1 hour until it's firm enough to slice cleanly
- Preheat and prep:
- Heat your oven to 350°F and line your baking sheets with parchment paper so those beautiful spirals won't stick
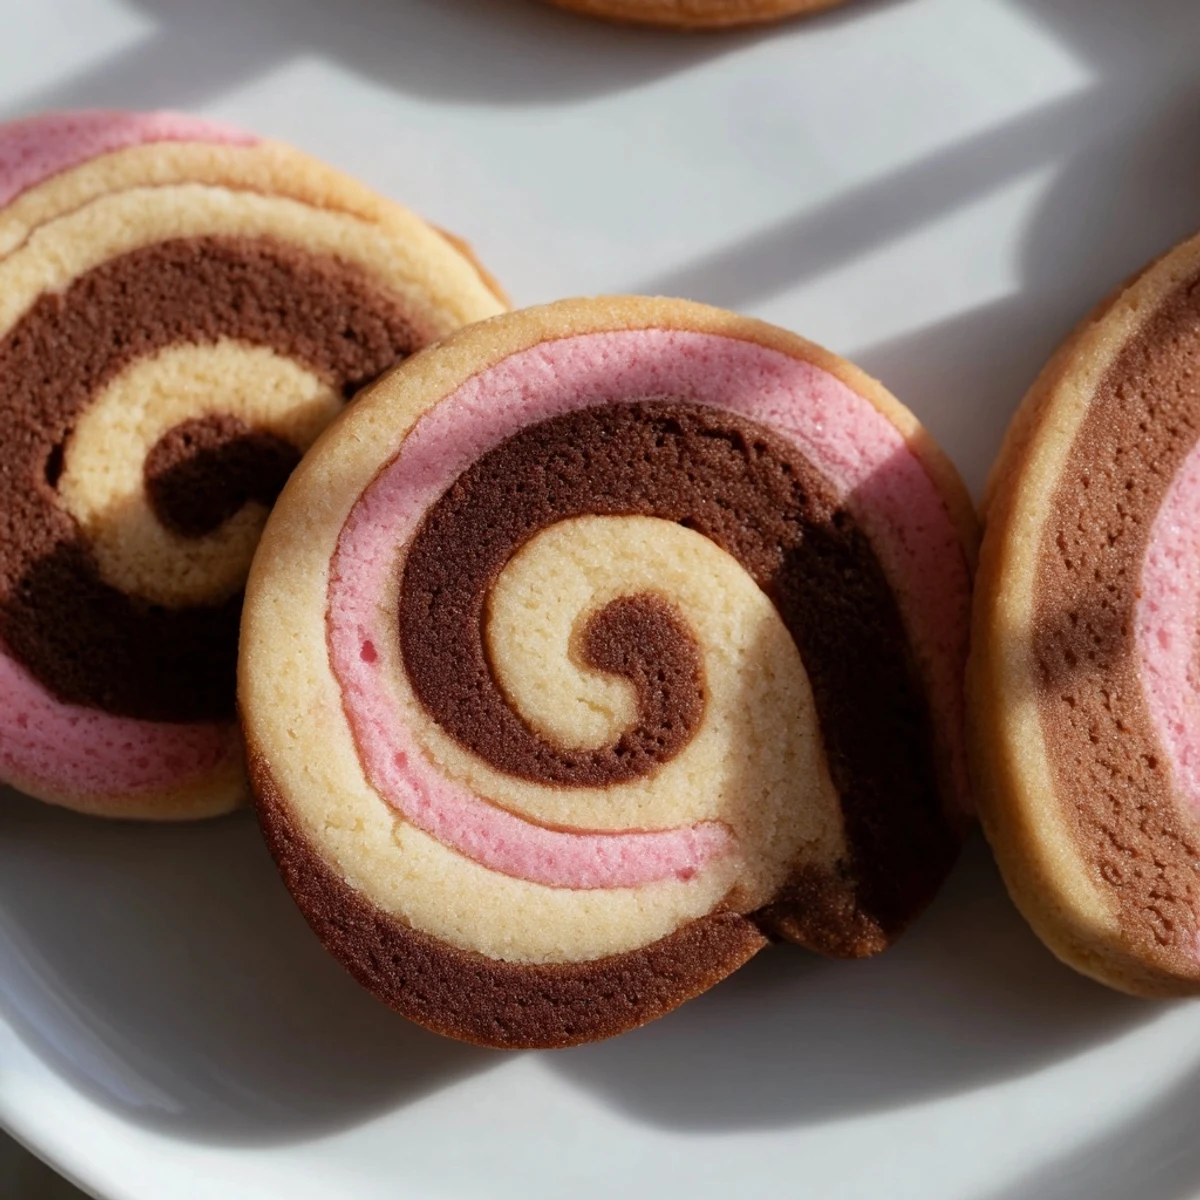
- Slice and reveal:
- Cut your chilled dough log into quarter-inch rounds, placing them two inches apart on your prepared baking sheets to give them room to spread
- Bake to perfection:
- Bake for 10 to 12 minutes until the edges are just barely golden, then let them cool on the baking sheet for 5 minutes before moving them to a wire rack
 Pin It
 My daughter's eyes widened the first time she saw me slice through that colorful log, revealing the perfect spirals inside like magic. Now she asks to help me roll the dough layers every time, and I've learned that having small hands press the layers together actually works wonderfully. These cookies have become our special holiday baking tradition, complete with flour-dusted aprons and pink-stained fingers.
Make Them Your Own
I've experimented with different flavor combinations over the years, like replacing the strawberry with raspberry or adding a fourth layer of green tea. The key is keeping the dough consistency the same across all layers so they roll together evenly. Once you master the basic technique, you can customize the flavors to match any occasion or craving.
Storage Secrets
These cookies actually develop deeper flavor after a day or two, so don't hesitate to make them ahead of time. I keep a log of dough in my freezer throughout the holiday season, slicing and baking just what I need for unexpected guests or sudden cookie cravings. Fresh-baked cookies in under fifteen minutes is always a win.
Serving Ideas
These showstoppers deserve a beautiful presentation, whether that's on a vintage cake plate or wrapped in clear bags with pretty ribbon as gifts. They're especially striking arranged in a spiral pattern on a platter, mimicking the beautiful design inside each cookie.
- Crumble them over vanilla ice cream for an impressive sundae topping
- Pair with a cup of Earl Grey tea for an elegant afternoon treat
- Package them in clear boxes with handwritten labels for the perfect homemade gift
 Pin It
 There's something magical about cutting into that log and seeing those perfect spirals emerge, like a little surprise you created yourself. Every batch reminds me why I fell in love with baking in the first place.
Recipe Questions
- → Why must the dough layers be chilled separately before stacking?
-
Chilling each layer individually firms the dough, preventing the colors from bleeding together during assembly and ensuring distinct, clean swirls in the final baked treats.
- → Can I use fresh strawberries instead of powder?
-
Fresh strawberries would add too much moisture to the dough, affecting texture. Freeze-dried strawberry powder provides concentrated flavor without altering the dough consistency.
- → How thin should I slice the dough log?
-
Slice the chilled log into 1/4-inch rounds for the best balance between structural integrity and quick, even baking. Thicker slices may require additional baking time.
- → What causes the swirls to become blurry or indistinct?
-
Insufficient chilling time causes the layers to soften and blend. Additionally, rolling too loosely or pressing too firmly when stacking can blur the distinct color boundaries.
- → Can I freeze the dough log for later baking?
-
Yes, wrap the shaped log tightly in plastic wrap and freeze for up to 3 months. Thaw in the refrigerator for 2-3 hours before slicing and baking.
- → Why does the dough crack when rolling?
-
Dough cracks when it's too cold. Let each portion sit at room temperature for 5-10 minutes before rolling, or roll between sheets of parchment paper to distribute pressure evenly.
