 Pin It
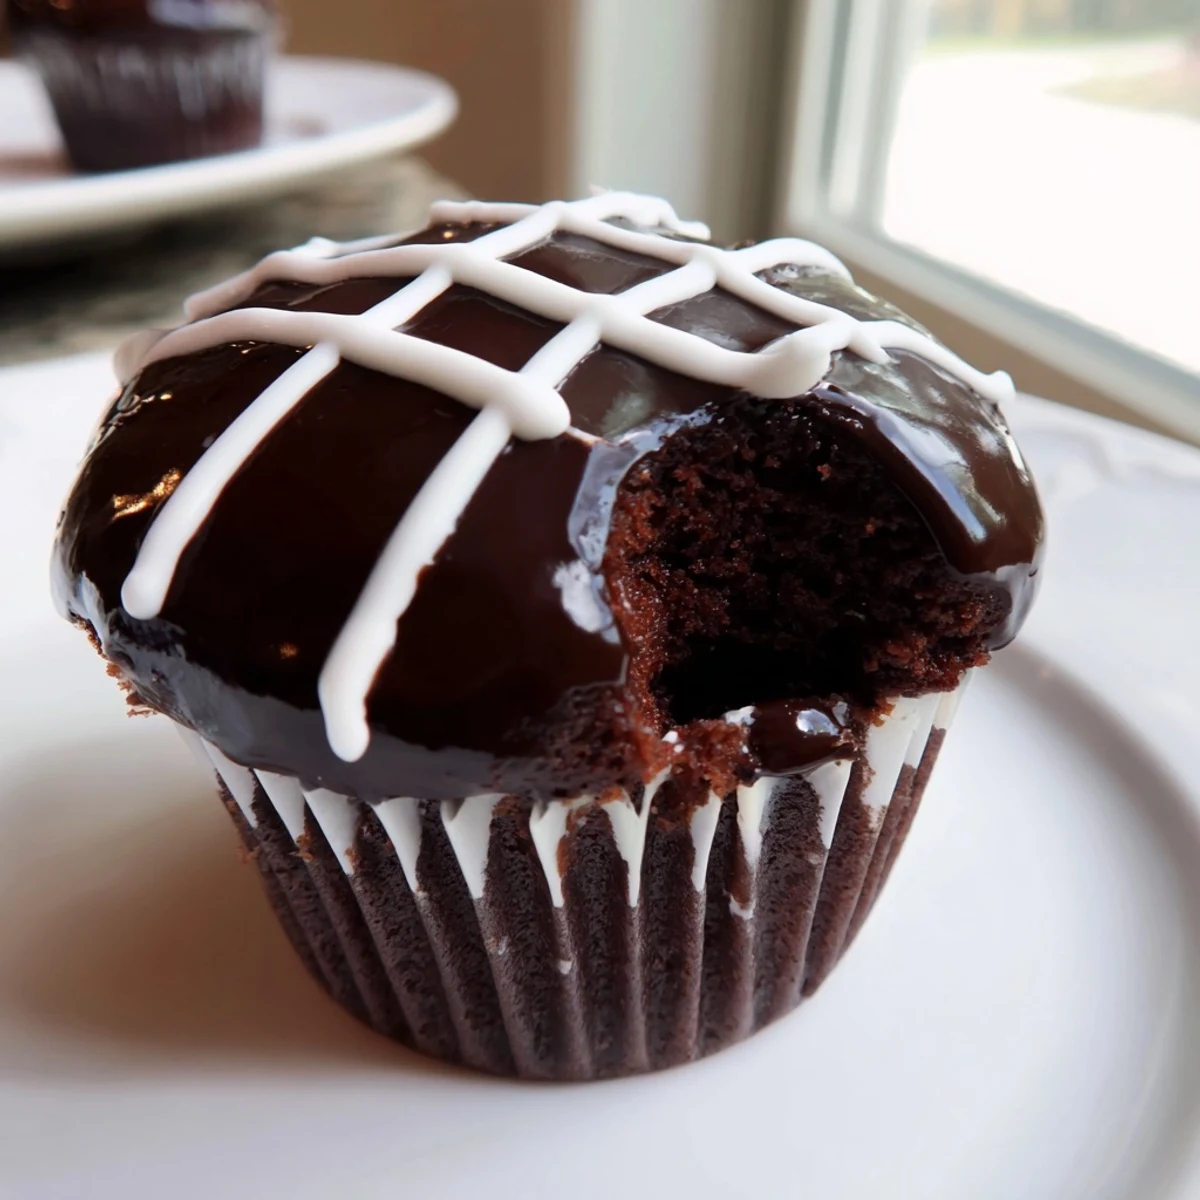
 These homemade Hostess cupcakes bring the beloved childhood treat straight to your kitchen. Rich chocolate cupcakes are baked until tender, then injected with a fluffy marshmallow filling that oozes with every bite.
A glossy chocolate ganache coats each cupcake in a smooth, shiny layer, while a drizzle of simple white icing creates that unmistakable squiggly swirl on top. The contrast of textures — soft cake, creamy center, and firm ganache — makes these truly irresistible.
Plan for about 90 minutes total, including cooling time. They're perfect for birthday parties, bake sales, or satisfying that nostalgic craving any day of the week.
My sister and I used to fight over the last Hostess cupcake in the lunchbox, tearing open the plastic wrapper and debating who got the piece with the most white swirl. Decades later, I found myself standing in my kitchen at midnight, covered in cocoa powder, trying to recreate that childhood obsession from scratch. The first batch was a disaster, but the third batch had me closing my eyes and tasting something close to magic.
I brought a platter of these to a neighborhood potluck last summer and watched three grown adults freeze mid conversation when they realized what they were eating. My neighbor Dave quietly ate four of them and then asked if I sold them. I do not, Dave, but the compliment still hangs in my kitchen air.
Ingredients
Cupcakes
- 1 cup (120 g) all-purpose flour: The structural backbone here, so spoon and level rather than scooping directly from the bag.
- 1/2 cup (45 g) unsweetened cocoa powder: This is where all your chocolate depth begins, so use the good stuff.
- 1 tsp baking powder and 1/2 tsp baking soda: Together they give the cake a soft rise without turning it into a dome.
- 1/4 tsp salt: Never skip this, because salt is what makes chocolate taste like itself.
- 1/2 cup (115 g) unsalted butter, softened: Leave it out for an hour before baking so it creams smoothly without melting.
- 1 cup (200 g) granulated sugar: Standard white sugar keeps the crumb tender and the sweetness balanced.
- 2 large eggs: Room temperature eggs blend more evenly into the batter.
- 1 tsp vanilla extract: A quiet supporting player that rounds everything out.
- 1/2 cup (120 ml) whole milk: Fat content matters here, so avoid using skim.
- 1/2 cup (120 ml) hot water: This blooms the cocoa and thins the batter into something silky.
Marshmallow Filling
- 1/2 cup (115 g) unsalted butter, softened: Creamed with sugar, this becomes the luxurious base of the filling.
- 1 cup (120 g) powdered sugar: Adds sweetness without grit, keeping the filling cloud smooth.
- 1 cup (100 g) marshmallow creme (fluff): The star ingredient that gives you that stretchy, nostalgic center.
- 1 tsp vanilla extract: Just enough to keep the marshmallow from tasting flat.
Chocolate Ganache
- 1/2 cup (120 ml) heavy cream: Heat it until it just steams, because boiling will scorch the chocolate.
- 4 oz (115 g) semi-sweet chocolate, chopped: Chop it fine so it melts evenly and quickly into the cream.
White Icing Swirl
- 1/4 cup (30 g) powdered sugar: A tiny amount goes a long way for those signature squiggles.
- 1 tsp whole milk: Added drop by drop until you get a thick but pipeable consistency.
Instructions
- Get the oven ready:
- Preheat your oven to 350 degrees F and line a 12 cup muffin tin with paper liners. This is the part where I always double check that I actually have liners before I start mixing everything.
- Sift the dry team:
- In a bowl, sift together the flour, cocoa powder, baking powder, baking soda, and salt. Sifting feels fussy but it really does prevent those dreaded cocoa lumps in your final cake.
- Build the butter base:
- Beat the softened butter and sugar in a large bowl until the mixture turns pale and fluffy, about three minutes. Add the eggs one at a time, mixing well after each, then stir in the vanilla until everything looks glossy and cohesive.
- Combine wet and dry:
- Add the flour mixture in three parts, alternating with the milk, mixing just until each addition disappears. Stir in the hot water last and watch the batter transform into something smooth and pourable.
- Bake and cool:
- Divide the batter evenly among the liners and bake for 18 to 20 minutes, or until a toothpick slides out clean. Let them cool completely in the pan before you even think about filling them.
- Whip the filling:
- Beat the butter and powdered sugar together until light and fluffy, then fold in the marshmallow creme and vanilla until the mixture is silky and thick enough to hold its shape inside the cake.
- Fill the centers:
- Transfer the filling to a piping bag fitted with a small round tip, insert the tip into the center of each cupcake, and squeeze gently until you feel the cake swell slightly. Save a little filling if you want to practice your swirl technique later.
- Make the ganache:
- Heat the cream until steaming, pour it over the chopped chocolate, and let it sit undisturbed for two minutes. Stir gently from the center outward until you have a glossy, dark pool of chocolate.
- Dip and set:
- Dip the top of each filled cupcake straight into the ganache, pull it out cleanly, and let them rest for about ten minutes while the chocolate sets into a beautiful shell.
- Swirl the signature squiggle:
- Mix the powdered sugar and milk into a thick paste, spoon it into a small piping bag, and pipe squiggly loops across each cupcake top. They do not need to be perfect, because the charm is in the imperfection.
 Pin It
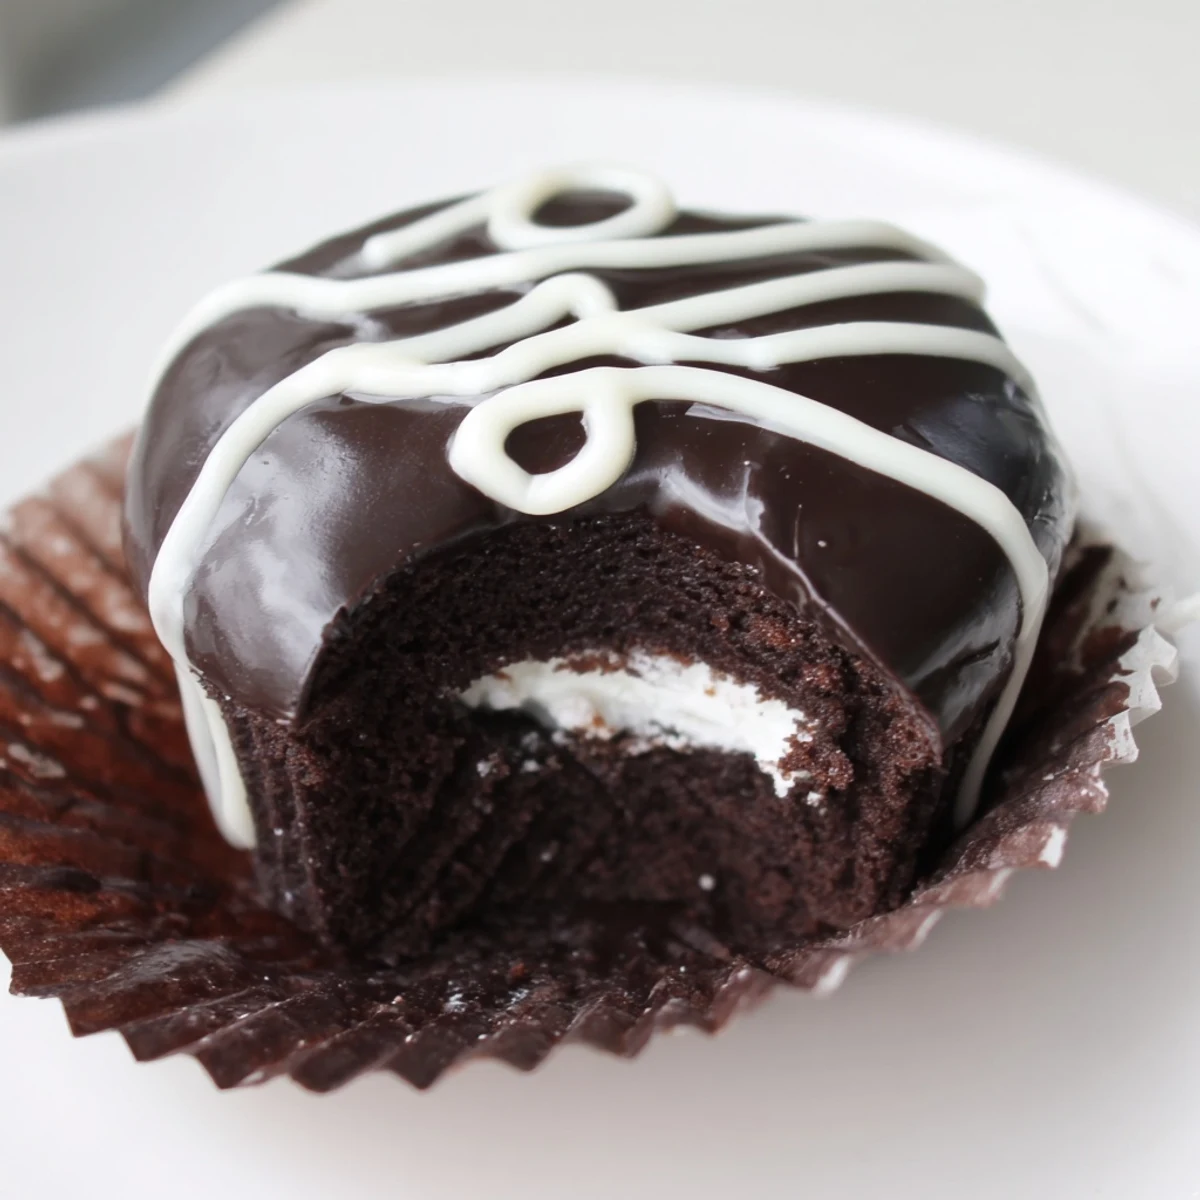
 The moment my daughter helped me pipe the white squiggles on our second batch, laughing at how crooked they looked, these cupcakes stopped being just a recipe and became a Saturday afternoon tradition.
Storing Your Cupcakes
Keep them covered at room temperature for up to three days, though honestly they rarely last that long in my house. The ganache shell protects the cake underneath surprisingly well. Avoid refrigerating them because the filling firms up and loses that soft, pillowy texture that makes these special.
Tools That Save You Time
A piping bag with a small round tip is nonnegotiable for getting that filling cleanly into the center. I tried using a zip top bag with a corner snipped off once and ended up with marshmallow filling on my ceiling. An electric mixer does most of the heavy lifting here, so use one if you have it.
Making Them Your Own
Once you have the basic technique down, these cupcakes are surprisingly forgiving little canvases for experimentation.
- Swap the marshmallow creme for peanut butter frosting if you want to go in a richer direction.
- Add a teaspoon of espresso powder to the cupcake batter to deepen the chocolate without adding coffee flavor.
- Always taste your ganache before dipping, because the quality of your chocolate determines everything.
 Pin It
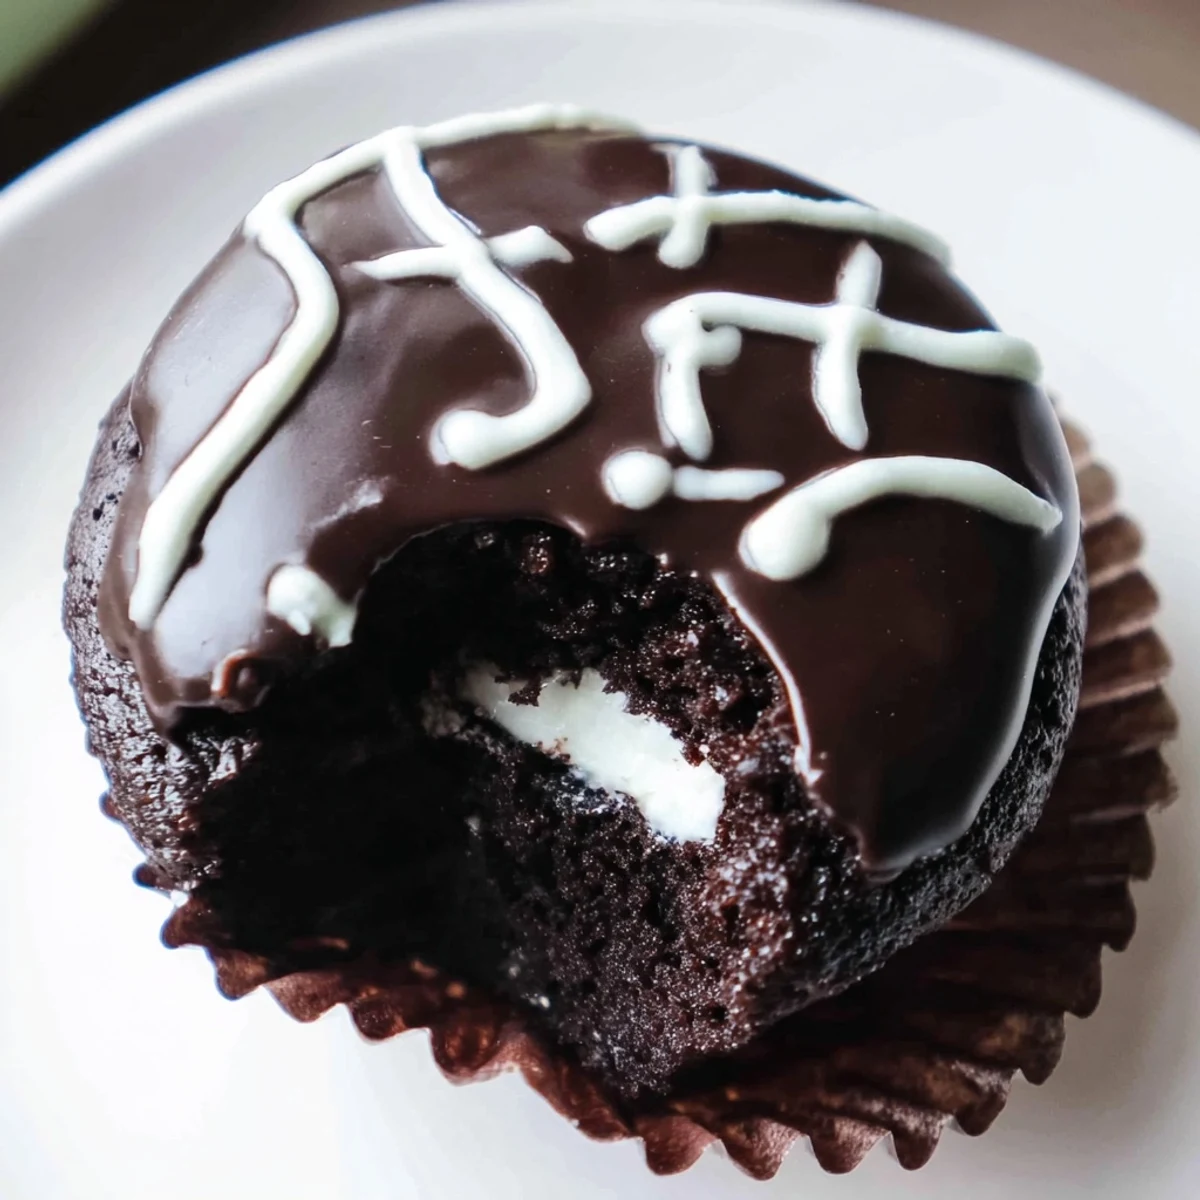
 Every time I make these, someone asks me if they are really homemade, and that question is the highest compliment I can imagine.
Recipe Questions
- → How do I get the marshmallow filling inside the cupcake?
-
Use a piping bag fitted with a small round tip. Insert the tip directly into the center of each cooled cupcake and gently squeeze to fill. You'll feel the cupcake slightly expand as the filling goes in.
- → Can I make these cupcakes ahead of time?
-
Yes, you can bake the cupcakes a day in advance. Store them in an airtight container at room temperature. Fill and frost them on the day you plan to serve for the best texture and freshness.
- → What type of cocoa powder works best?
-
Both natural and Dutch-processed cocoa powder work well. Dutch-processed cocoa will give you a deeper, richer chocolate flavor and darker color, which closely matches the classic Hostess look.
- → Why did my ganache turn out runny?
-
Runny ganache usually means it needs more time to cool and set. Let it sit at room temperature for 10–15 minutes, stirring occasionally. It should thicken to a dip-able consistency before coating the cupcakes.
- → How should I store finished cupcakes?
-
Store covered at room temperature for up to 3 days. Avoid refrigerating as it can dry out the cake and cause the ganache to lose its glossy finish. An airtight container works best.
- → Can I use a different filling instead of marshmallow?
-
Absolutely. Buttercream, whipped cream, or even a cream cheese filling are delicious alternatives. However, marshmallow creme delivers that authentic Hostess flavor and fluffy texture most people expect.
