 Pin It
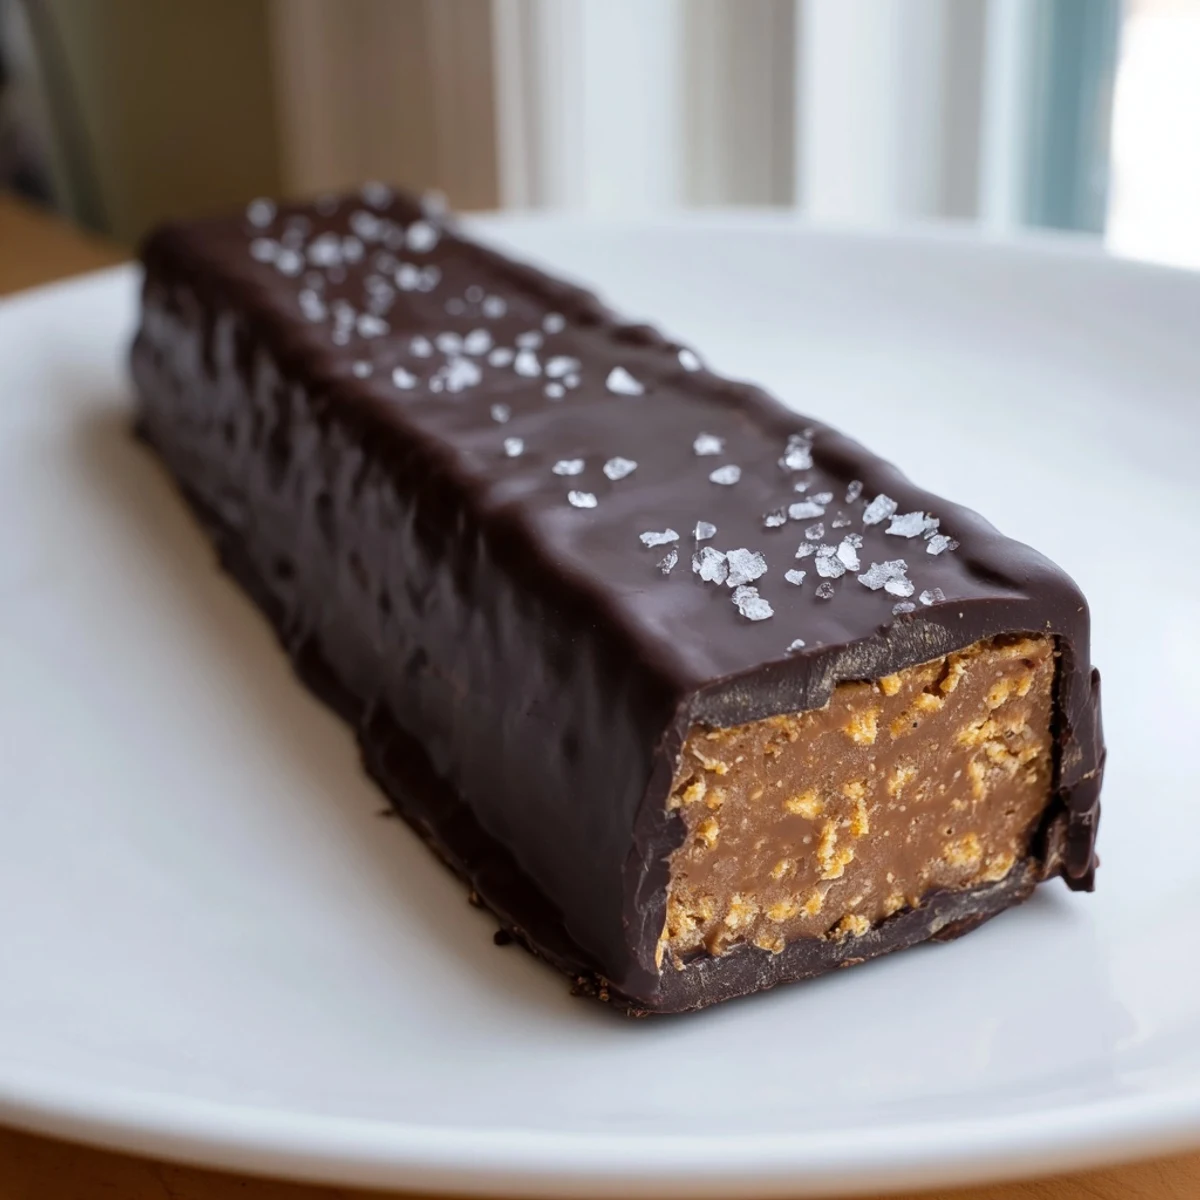
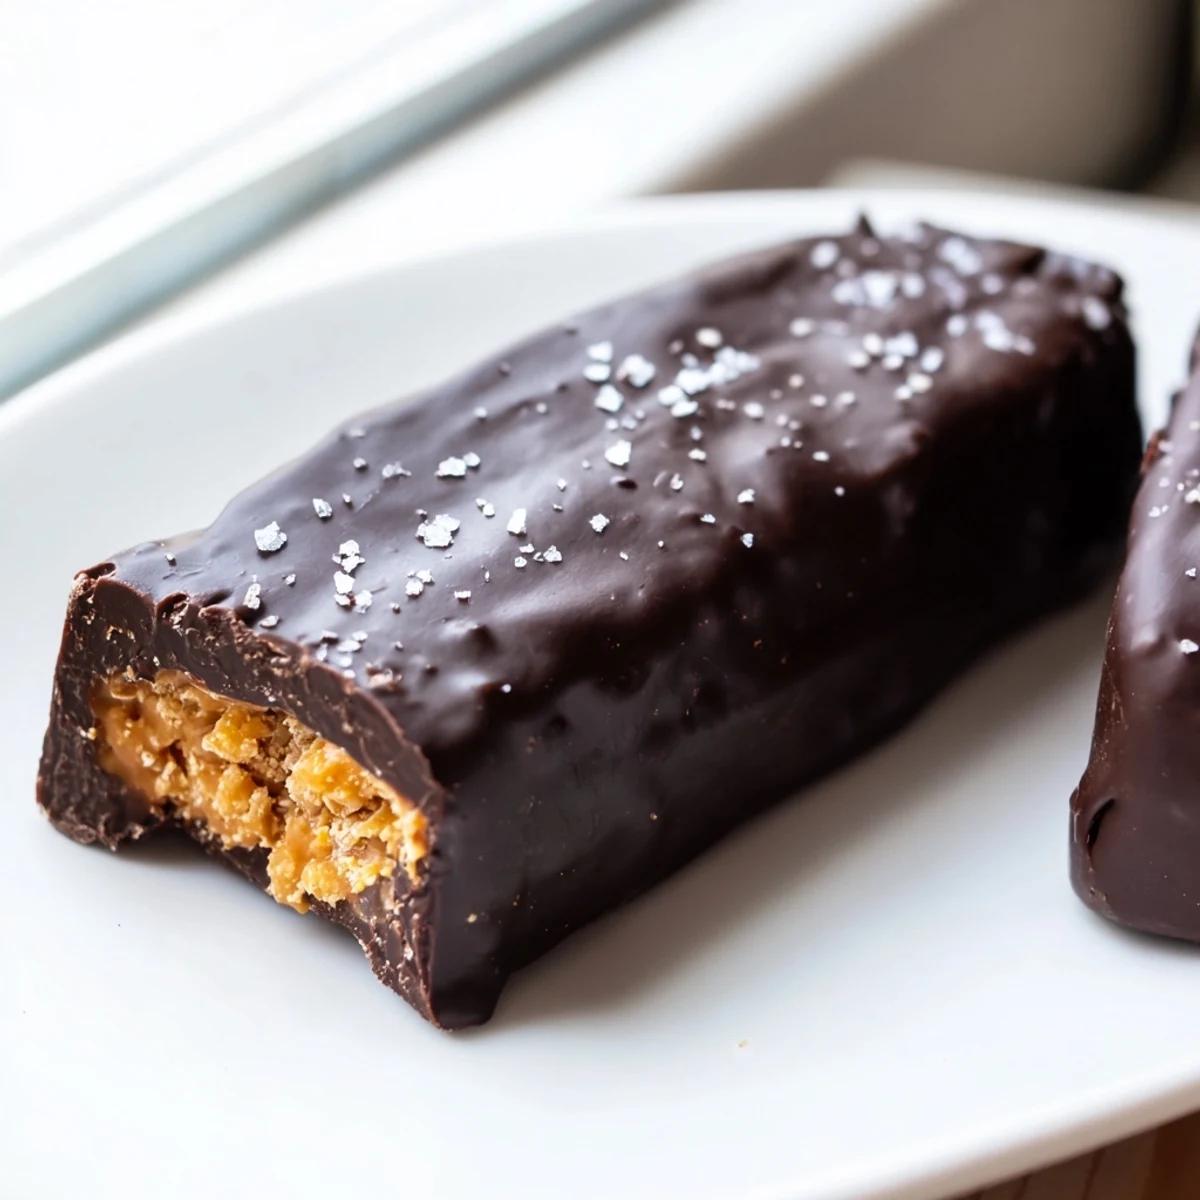
 These homemade Butterfinger bars deliver the satisfying crunch and sweet-salty peanut butter flavor of the classic candy, but with wholesome ingredients you can feel good about. A simple mixture of natural peanut butter, maple syrup, and crushed cornflakes forms the crisp interior, while a glossy dark chocolate coating seals in all that textured goodness.
Ready in about an hour with no oven needed, these no-bake bars come together quickly on the stovetop and set up in the freezer. They're naturally vegetarian and easily made vegan and gluten-free with simple ingredient swaps. Each bite offers that signature snap of crunchy peanut butter enrobed in smooth, rich chocolate.
The candy aisle at the grocery store always gets me, especially those orange and yellow Butterfinger packages winking from the shelf. One rainy Tuesday I decided to stop buying them and start making my own version at home. My kitchen smelled like roasted peanuts and melted chocolate for hours, and honestly that was half the reward. These bars capture everything I love about the original but with ingredients I can actually feel good about eating.
I brought a batch of these to a movie night with friends and watched everyone freeze midbite when they realized they were homemade. My friend Dave held his up to the light and said no way, which might be the best compliment a candy bar can get.
Ingredients
- Natural creamy peanut butter: The one ingredient you should not substitute, because natural peanut butter gives the filling its authentic roasted flavor and the right consistency without added oils.
- Pure maple syrup or honey: This binds everything together and adds gentle sweetness, and I learned that maple syrup creates a slightly softer center while honey firms things up more.
- Vanilla extract: Just a teaspoon rounds out the flavors and makes the filling taste more like a candy bar than a peanut butter snack.
- Cornflakes: Lightly crushed is the key here because big pieces give great crunch but turn into shards, while too-fine crumbs disappear entirely into the mixture.
- Sea salt: A pinch in the filling balances the sweetness and makes the peanut flavor pop in a way that keeps you reaching for another bar.
- Dark chocolate chips: Choose a good quality brand you enjoy eating on its own because the coating is half the experience, and darker chocolate pairs beautifully with the sweet peanut center.
- Coconut oil: This thins the chocolate into a dippable consistency and gives the coating that satisfying snap when you bite into a cold bar.
Instructions
- Prep the pan:
- Line an 8 by 8 inch baking dish with parchment paper, leaving some overhang on the sides so you can lift the whole slab out later without fighting it.
- Warm the peanut butter mixture:
- In a saucepan over medium low heat, stir the peanut butter and maple syrup together until they melt into a silky golden pool and everything feels warm and unified, about two to three minutes.
- Add flavor and crunch:
- Take the pan off the heat and stir in the vanilla and salt, then gently fold in the crushed cornflakes until every flake wears a glossy coat of peanut butter.
- Freeze the slab:
- Spread the mixture into your prepared pan and press it flat and even with a spatula, then slide it into the freezer for twenty to thirty minutes until it holds its shape when pressed.
- Cut into bars:
- Lift the set slab out using the parchment overhang and place it on a cutting board, then slice it into sixteen bars with a sharp knife using confident downward strokes.
- Melt the chocolate:
- Combine the chocolate chips and coconut oil in a microwave safe bowl and heat in thirty second bursts, stirring between each, until the mixture is glossy and completely smooth.
- Coat each bar:
- Dip each bar into the melted chocolate one at a time, turning it with a fork to cover all sides, then let the excess drip off before placing it on a parchment lined tray.
- Set and store:
- Refrigerate the coated bars for fifteen to twenty minutes until the chocolate shell hardens with a satisfying snap, then transfer them to an airtight container kept in the fridge.
 Pin It
 There is something deeply satisfying about peeling the parchment off a finished bar and hearing that first crack of chocolate under your thumb.
What I Learned After Making These a Dozen Times
The second time I made these I got cocky and skipped the coconut oil, which left me with a thick gloopy chocolate mess that refused to coat anything evenly. Now I always taste the peanut butter mixture before adding the cornflakes because different brands vary wildly in salt content, and a quick adjustment at that stage saves the whole batch.
Storing Your Candy Bars the Right Way
These bars live happily in the refrigerator for about two weeks, though in my experience they rarely last that long. You can also freeze them layered between sheets of parchment for up to three months, which means you can always have a homemade candy bar waiting when the mood strikes.
Little Things That Make a Big Difference
The small details are what separate a good homemade candy from a great one, and most of them cost nothing extra.
- Sprinkle flaky sea salt on top of each bar right after dipping while the chocolate is still wet.
- Let the bars sit at room temperature for five minutes before eating so the filling softens slightly and the texture mirrors the real thing.
- Always check that your cornflakes are certified gluten free if that matters to you, because conventional ones often contain barley malt.
 Pin It
 Homemade candy bars feel like a small act of rebellion against the vending machine, and these ones earn their place in your freezer. Share them generously or hide them behind the frozen peas, because either way you will be glad you made them.
Recipe Questions
- → Can I make these bars completely vegan?
-
Yes, simply use maple syrup instead of honey and choose dairy-free dark chocolate chips. Coconut oil remains the same. With those two easy swaps, the entire batch is fully vegan-friendly.
- → Why are my cornflakes getting soggy in the mixture?
-
Lightly crushing the cornflakes rather than finely crushing them helps maintain crunch. Also, work quickly when folding them into the warm peanut butter mixture and spread it into the pan right away to minimize moisture exposure.
- → How should I store these chocolate-dipped bars?
-
Store the finished bars in an airtight container in the refrigerator for up to 2 weeks. For longer storage, freeze them for up to 3 months. Let frozen bars sit at room temperature for a few minutes before enjoying for the best texture.
- → Can I use a different type of chocolate for the coating?
-
Absolutely. Milk chocolate or semi-sweet chocolate chips work well in place of dark chocolate. You could even try white chocolate for a sweeter, creamier coating. Just keep the coconut oil ratio the same for a smooth, dip-friendly consistency.
- → What can I substitute for cornflakes if I need them gluten-free?
-
Look for certified gluten-free cornflakes, which are available from several brands. Alternatively, crushed rice cereal or gluten-free graham crackers can provide a similar crunchy texture in the peanut butter filling.
- → Why add coconut oil to the melted chocolate?
-
Coconut oil thins the melted chocolate slightly, making it easier to dip and coat each bar evenly. It also helps the chocolate set with a nice snap and a glossy, professional-looking finish once chilled.
