 Pin It
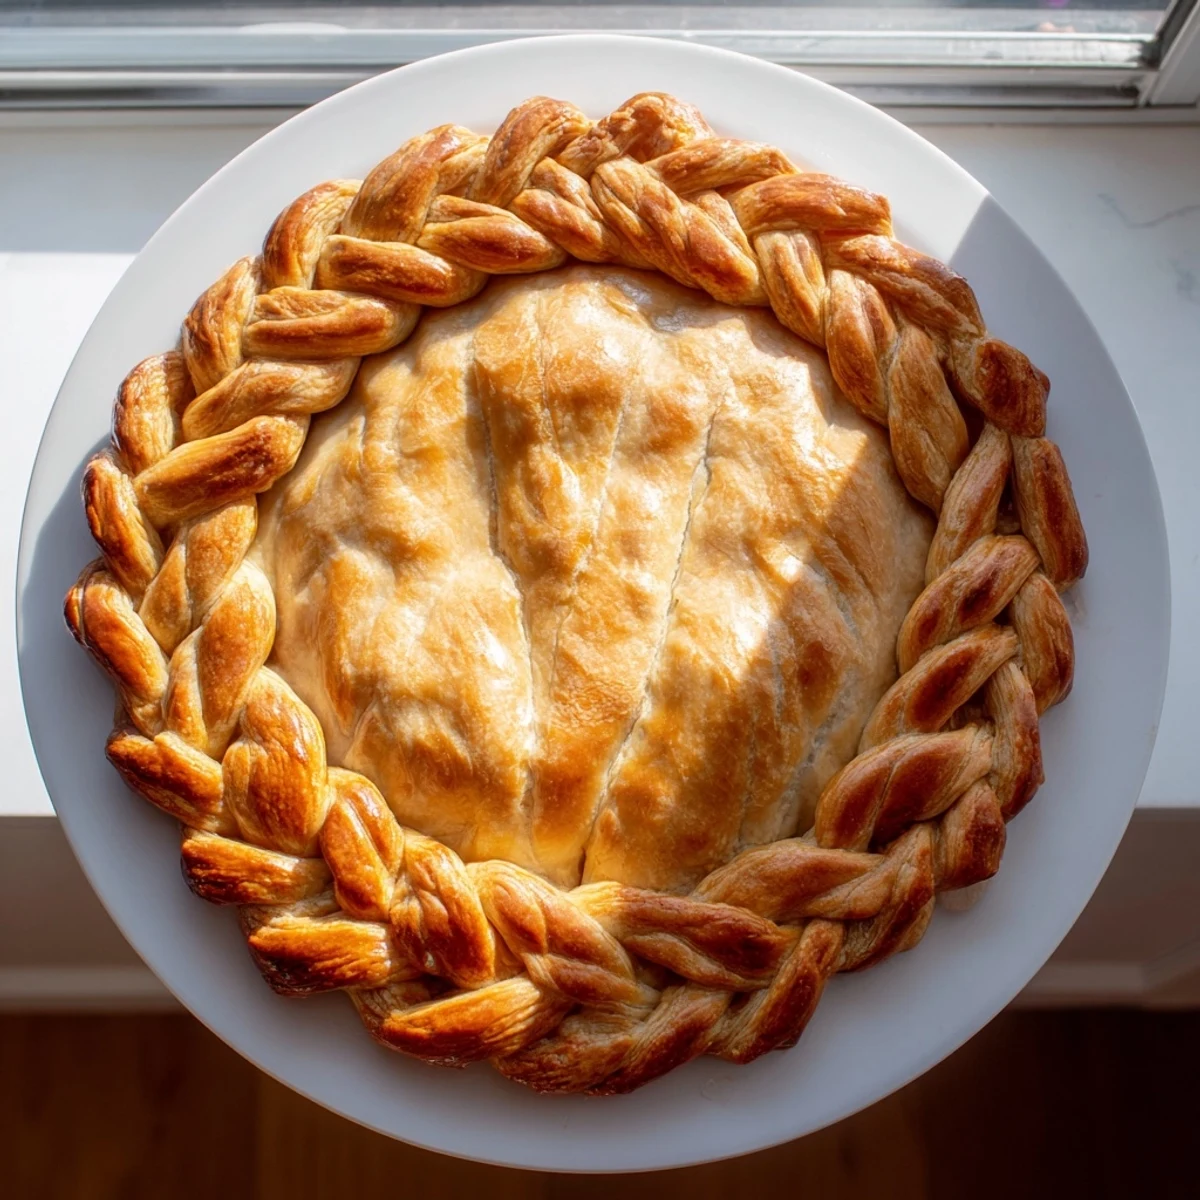
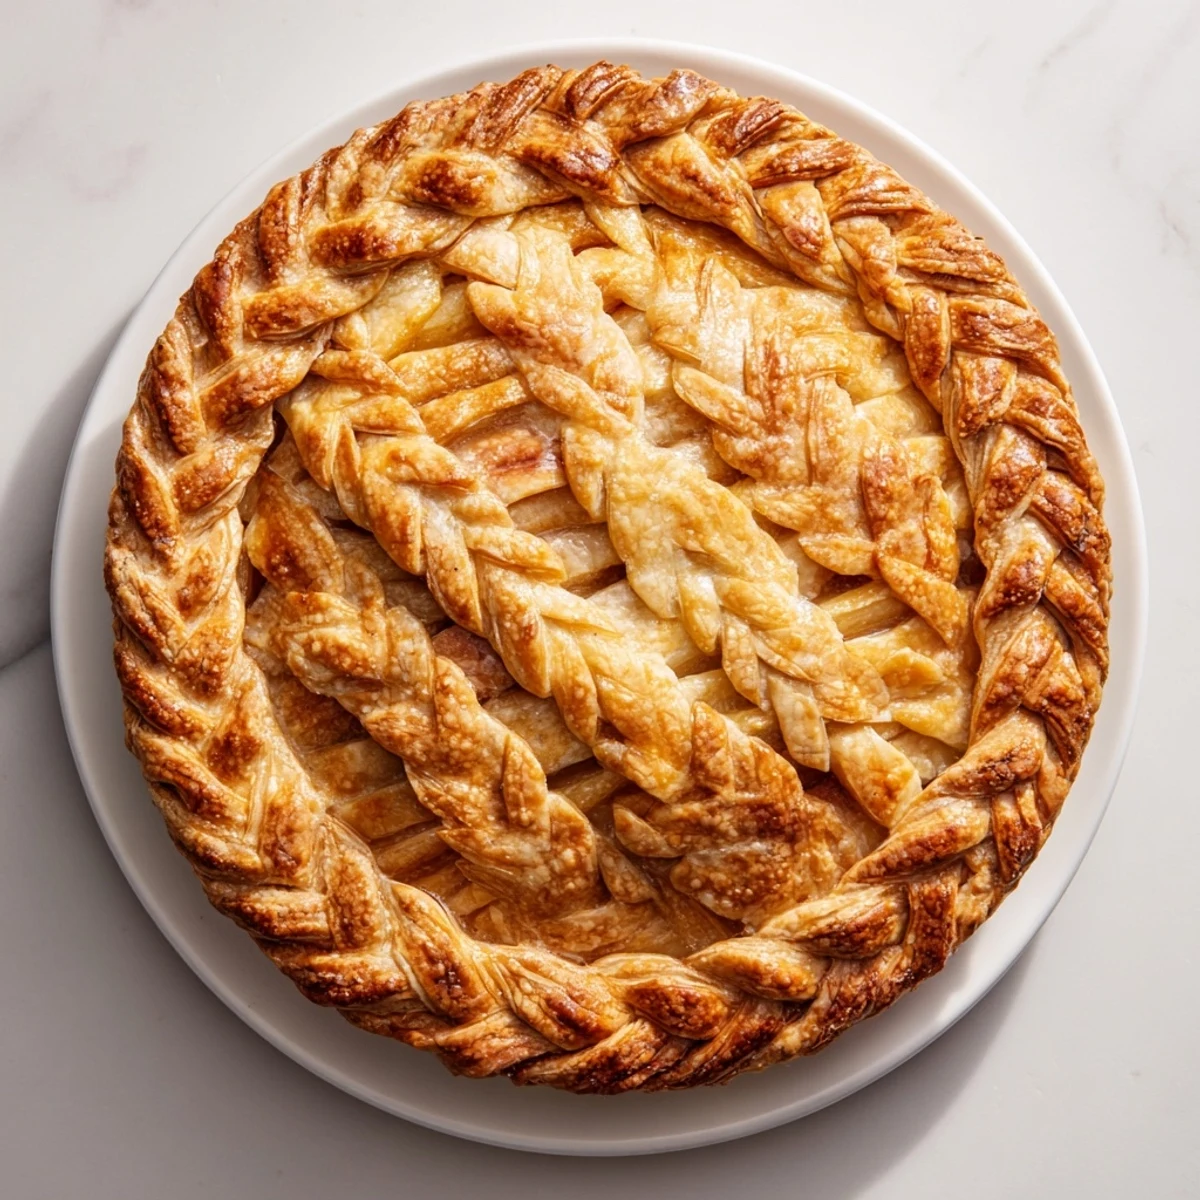
 Transform ordinary pies into stunning centerpieces with this fishtail braid crust technique. The method involves rolling classic pastry dough into thin strips, weaving them into intricate braids, and attaching them around the pie rim for a professional bakery appearance. Perfect for holiday gatherings, dinner parties, or anytime you want to impress with presentation. The braid works beautifully with fruit pies, quiches, chicken pot pies, and savory tarts. Keep your dough chilled and work quickly for clean edges that bake to golden perfection.
The first time I attempted a braided pie crust, my kitchen looked like a flour explosion and my braid came out lopsided. But that golden, woven edge was so worth the mess. Now I make these fishtail braids whenever I need a pie that stops conversation. People always ask how long it took, which makes me secretly pleased.
My sister called me mid-panic last Thanksgiving, certain she'd ruined her pumpkin pie with a sad, crimped edge. I talked her through this braid step by step over the phone. When she sent a photo later, that crust looked better than mine.
Ingredients
- 2 1/2 cups all-purpose flour: The foundation of everything flaky and wonderful in pie baking
- 1 cup unsalted butter, cold: Keep those cubes icy cold, this is what creates those beautiful layers
- 1 tsp salt: Dont skip this, it balances the sweetness and deepens the flavor
- 1 tbsp sugar: Optional, but I add it even for savory pies because it helps with browning
- 1/4 to 1/2 cup ice water: Add slowly, you might not need it all, let the dough be your guide
- 1 egg, beaten: For that gorgeous professional shine on the finished braid
- 1 tbsp milk or water: Thins the egg wash so it brushes on smoothly and evenly
Instructions
- Make the pie dough:
- Whisk flour, salt, and sugar together in a large bowl, then work in cold butter until you see pea-sized pieces scattered throughout like little treasures. Add ice water gradually, mixing gently until the dough holds together when squeezed, then divide into two disks and chill for at least one hour.
- Cut your strips:
- Roll one chilled disk into a rectangle about 1/8 inch thick on a floured surface, then use a ruler and knife or pizza cutter to cut at least six even strips, each about 12 inches long and 1/2 inch wide, keeping everything cool to the touch.
- Create the fishtail braid:
- Press three strips together at one end, begin with a regular braid for one set, then switch to the fishtail technique by crossing the outermost right strip to center, then outermost left to center, always pulling from the outside until you reach the end.
- Attach to your pie:
- Trim excess dough from your filled pie and brush the rim lightly with water, then gently lift and shape your braids around the edge, pressing lightly to adhere before brushing with egg wash for that golden finish.
- Bake to perfection:
- If baking with filling, proceed as your recipe directs, or for blind baking, chill the braided crust for 15 minutes then bake at 375°F until golden, about 12 to 15 minutes.
 Pin It
 Last summer I made a cherry pie with this crust for a neighborhood potluck. Three different people asked for the recipe, which is basically the highest compliment a pie can receive.
Keeping Your Dough Happy
Cold butter creates flaky layers, so keep those ice cubes handy and work efficiently. If your kitchen runs warm, chill your rolling pin and even your flour before starting.
Choosing Your Fillings
This braid works beautifully with fruit pies, quiches, and even savory pot pies. The design is so striking that even simple fillings feel elevated and special.
Making It Your Own
Once you have mastered the basic braid, try weaving in thin strips of colored dough made with beet juice or spinach puree for a truly stunning effect.
- Practice the fishtail technique with scraps before committing to your final strips
- Brush the braid halfway through baking if it needs more golden color
- Make extra braids and bake them separately as decorative garnish
 Pin It
 There is something deeply satisfying about serving a pie that looks like it came from a professional bakery. This crust is your secret weapon.
Recipe Questions
- → What makes fishtail braiding different from regular braiding?
-
Fishtail braiding uses only two sections crossed from the outer edges toward the center, creating a flatter, wider woven pattern. Regular three-strand braiding crosses sections over the middle in a more traditional pattern. The fishtail technique produces a delicate, intricate appearance that resembles a woven basket or actual fishtail.
- → Can I make the braids ahead of time?
-
Absolutely. You can prepare the braided strips up to 24 hours in advance. Place them on a parchment-lined baking sheet, cover loosely with plastic wrap, and refrigerate. When ready to use, bring them to room temperature for about 5 minutes before arranging around your pie crust edge. This timing makes prep work much easier for large gatherings.
- → How do I prevent the braids from unraveling during baking?
-
Press both ends of each braid firmly together to seal. When attaching to the pie, brush the crust rim with water or egg wash before placing the braid—this acts as glue. Gently press the braid onto the dampened edge. Keep everything chilled until baking, as cold dough holds its shape better. The egg wash brushed over the finished braid also helps seal the pattern.
- → What fillings work best with braided crusts?
-
Almost any filling pairs beautifully. Fruit pies like apple, cherry, and berry showcase the braid elegantly. Savory options include quiches, chicken pot pies, and vegetable tarts. The decorative edge works particularly well for deep-dish pies where the crust is a prominent feature. Avoid very runny fillings that might bubble over and obscure your detailed work.
- → Can I add color or flavor variations to the braids?
-
Certainly. Mix herbs like rosemary or thyme into the dough for savory pies. For sweetness, add cinnamon or citrus zest. Create visual interest by weaving in strips colored with beet juice (red), spinach juice (green), or turmeric (yellow). You can also brush the finished braid with colored egg washes or sprinkle with coarse sugar, herbs, or sesame seeds before baking.
- → What's the best way to store leftover braided pie?
-
Store uncovered pies at room temperature for up to 2 days. For longer storage, cover loosely with foil or place in a pie container. Refrigerate cream or custard-filled pies. The braided crust may soften slightly in the fridge but can be refreshed in a 350°F oven for 5-10 minutes. Fully baked pies freeze well for up to 3 months—wrap tightly in plastic and foil, then thaw at room temperature before serving.
